Build Bitcoin-Core from Sources
In this article, we'll walk you through the steps to build bitcoin-core from sources on an Ubuntu machine.
Install dependencies
First, you'll need to install dependencies required to build bitcoind:
sudo apt update
sudo apt upgrade
sudo apt install -y nano git
sudo apt install -y build-essential libtool autotools-dev automake pkg-config
sudo apt install -y libevent-dev libboost-dev libsqlite3-dev
sudo apt install -y libminiupnpc-dev libnatpmp-dev libzmq3-dev systemtap-sdt-dev
This will update the Ubuntu package list and install the necessary packages for building Bitcoin Core.
Clone Bitcoin repo
Next, clone the Bitcoin Core repository from GitHub by entering the following commands:
cd
git clone https://github.com/bitcoin/bitcoin.git
cd bitcoin
git checkout tags/v27.0
This will download the Bitcoin Core source code and switch to the v27.0 tag.
Build Bitcoin
Now we can build Bitcoin Core from sources. Run the following commands in the terminal:
cd ~/bitcoin
./autogen.sh
./configure
make -s -j8
The -j option with a number following it (in this case, -j8) is used to specify the number of cores to use during the compilation process. In this case, make (the program used to compile Bitcoin Core) is being instructed to use 8 cores (-j8) to speed up the compilation process.
This may take some time to complete, depending on your system's processing power.
Firewall setting
The Bitcoin network operates on a peer-to-peer basis, which means that nodes in the network need to communicate with each other in order to propagate transactions and blocks.
Port 8332 is used for the JSON-RPC interface, which allows programs to communicate with the Bitcoin daemon using the Remote Procedure Call (RPC) protocol. The JSON-RPC interface is used by wallets and other applications to query the Bitcoin node for information about the blockchain, to send and receive transactions, and to perform other operations, it is not recomended to open this port to the public, but some people can decide to acces it from their local network.
In addition to private Bitcoin nodes, there are also public Bitcoin nodes that are designed to be accessible by anyone on the internet. These nodes are typically run by individuals or organizations that want to contribute to the decentralization and security of the Bitcoin network by providing a publicly accessible node for other users to connect to.
Public Bitcoin nodes typically have port 8333 open in order to allow other nodes on the network to connect to them. By providing a publicly accessible node, these users help to ensure that the Bitcoin network remains robust and resistant to attacks, as the more nodes there are on the network, the more difficult it becomes for an attacker to compromise a significant portion of the network.
Port 8333 is used for the Bitcoin peer-to-peer network protocol. This protocol is used by Bitcoin nodes to discover and connect to other nodes in the network, to propagate transactions and blocks, and to synchronize their copies of the blockchain with other nodes.
If you want to allow incoming connections to the Bitcoin Core daemon through the firewall, run the following commands in the terminal:
sudo apt install -y ufw
sudo ufw allow OpenSSH
sudo ufw allow 8332
sudo ufw allow 8333
Overall, running a public Bitcoin node is a valuable contribution to the health and security of the Bitcoin network, and can be a rewarding experience for those with the technical expertise to do so. However, it's important to take appropriate security measures to protect the node from attack, and to be aware of the potential risks and challenges involved in running a public node.
Install bitcoind service
Now that we have built Bitcoin Core, we can install it as a systemd service. Run the following commands in the terminal:
Copy binaries to /usr/bin/:
cd src
sudo cp bitcoin{d,-cli} /usr/bin/
The command cd src is used to navigate to the src directory within the cloned Bitcoin repository . The src
directory contains the source code for the Bitcoin Core client.
The command sudo cp bitcoin{d,-cli} /usr/bin/ is used to copy the compiled binaries for the Bitcoin daemon
(bitcoind) and command line interface (bitcoin-cli) to the /usr/bin/ directory, which is a system-wide directory for
executable programs. The {d,-cli} syntax is a shorthand way of copying both the bitcoind and bitcoin-cli binaries
in a single command.
Generate RPCAuth credentials:
cd ~/bitcoin/share/rpcauth
python3 rpcauth.py <username>
where
you should get something like this returned:
String to be appended to bitcoin.conf:
rpcauth=pyth:cd777c0850a95831afe1a1ff6df7caf8$0af73fe7ca1f689c225c01bb6bacc0fac57fca32be1f13173718501b2575637c
Your password:
EATDQY_25tUoyJEXvdEkuyCFaEiOzbjX02-6_FLzo7k
save this, you'll have to use soon
now lets prepare the configuration file:
cd
mkdir .bitcoin && cd .bitcoin
nano bitcoin.conf
The command cd is used to navigate back to the user's home directory, and the command mkdir .bitcoin && cd .bitcoin
is used to create a new directory called .bitcoin in the home directory, and then navigate into that directory.
Finally, the command nano bitcoin.conf is used to create and open a new file called bitcoin.conf in the .bitcoin
directory using the Nano text editor. This file is used to configure the settings for the Bitcoin Core client, such as
network and wallet settings, and is necessary for the client to run properly. The user can add and edit settings in
this file as needed:
listen=1

rpcauth=pyth:cd777c0850a95831afe1a1ff6df7caf8$0af73fe7ca1f689c225c01bb6bacc0fac57fca32be1f13173718501b2575637c
rpcallowip=0.0.0.0/0
rpcbind=0.0.0.0
Save the file and exit the editor.
Here's an explanation of each of the settings in the bitcoin.conf file, you can :
listen=1: This setting allows the Bitcoin Core client to listen for incoming connections from other nodes on the
network. By default, Bitcoin Core clients only connect to a small number of other nodes for security reasons, but
enabling listening allows other nodes to connect to your client as well, making it a more active participant in the
network.
rpcauth= ... define the username and password for remote procedure calls (RPC) to the client, it's the credential
you generate using rpcauth.py previously. RPC is a protocol used for communication between different applications,
and it's used by many Bitcoin applications to communicate with the client. The username and password are used to
authenticate the connection and ensure that only authorized applications can access the client's data. By default
bitcoin core will use cookie authentication instead.
rpcallowip=0.0.0.0/0: This setting allows RPC connections to come from any IP address. This is a potentially risky
setting because it opens up the client to connections from any machine on the internet, so it should only be used if
you trust all of the machines that might connect to the client.
rpcbind=0.0.0.0: This setting specifies the IP address on which the client should listen for incoming RPC connections.
0.0.0.0 means that the client should listen on all available network interfaces. This is necessary if you want to
allow remote connections to the client from other machines.
These are only few example of the possible settings of bitcoin core, you can find more details about all the possible settings for Bitcoin Core in the official documentation available on the Bitcoin Core website.
The documentation provides a comprehensive list of all configuration options, including their purpose and syntax. It also includes recommendations and best practices for setting up a Bitcoin node.
You can get user documentation into your cli using the bitcoind --help command or on the official documentation
Next, create a systemd service file by running the following command:
sudo nano /etc/systemd/system/bitcoind.service
Copy and paste the following text into the file:
[Unit]
Description=Bitcoin daemon
After=network.target

[Service]
ExecStart=/usr/bin/bitcoind -daemon -datadir=/home/pythcoiner/.bitcoin
RuntimeDirectory=bitcoind
User=pythcoiner
Type=forking
PIDFile=/home/pythcoiner/.bitcoin/bitcoind.pid
Restart=on-failure
RestartSec=3

PrivateTmp=true
ProtectSystem=full
NoNewPrivileges=true
PrivateDevices=true

[Install]
WantedBy=multi-user.target
(here you should replace pythcoiner with the linux username that will run bitcoind)
After creating the service file, the next step is to reload the systemd daemon and enable and start the Bitcoin
Core service:
sudo systemctl daemon-reload
sudo systemctl enable --now bitcoind.service
The daemon-reload command reloads the systemd daemon to read the new configuration file for the bitcoind service.
The enable command enables the bitcoind service to start automatically at boot time, and the --now option starts the service immediately.
With these steps complete, your Bitcoin Core node is up and running on your Ubuntu machine. You can now check your node is running well with this command:
bitcoin-cli -getinfo
You can also have a look at this video.
Bitcoin core rpc reference
The bitcoin-core rpc reference can be found here.
It have been automatically generated using this tool
Build Liana from sources on MacOS
Rust toolchain
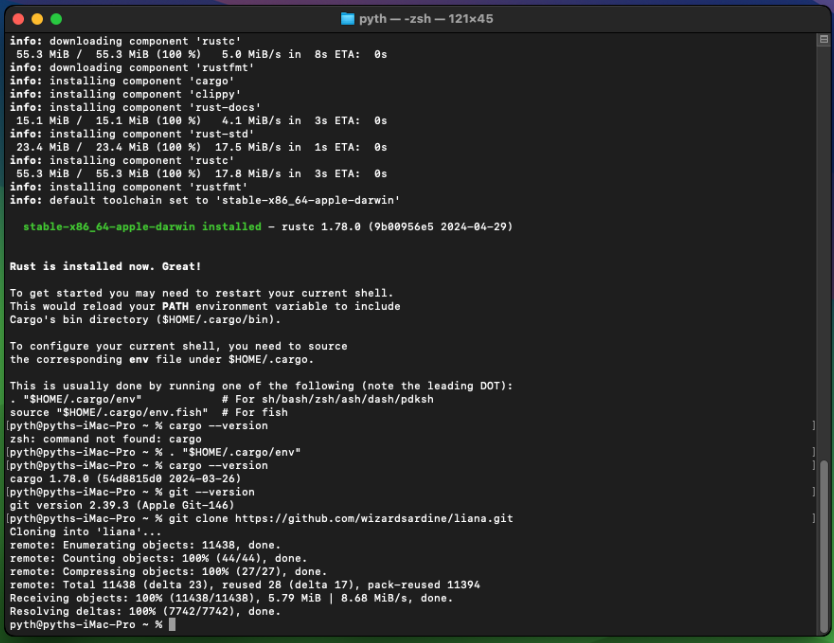
If you visit rust website you will find the commands for install rust on your system:
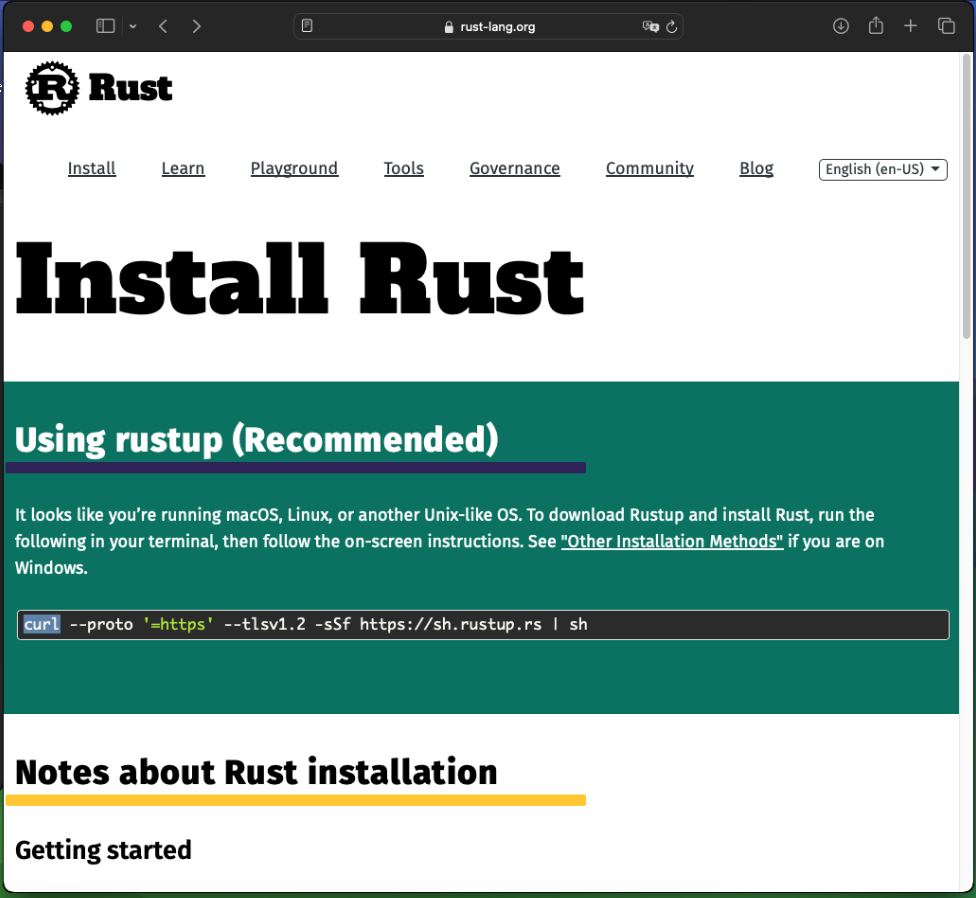
You should open a terminal:
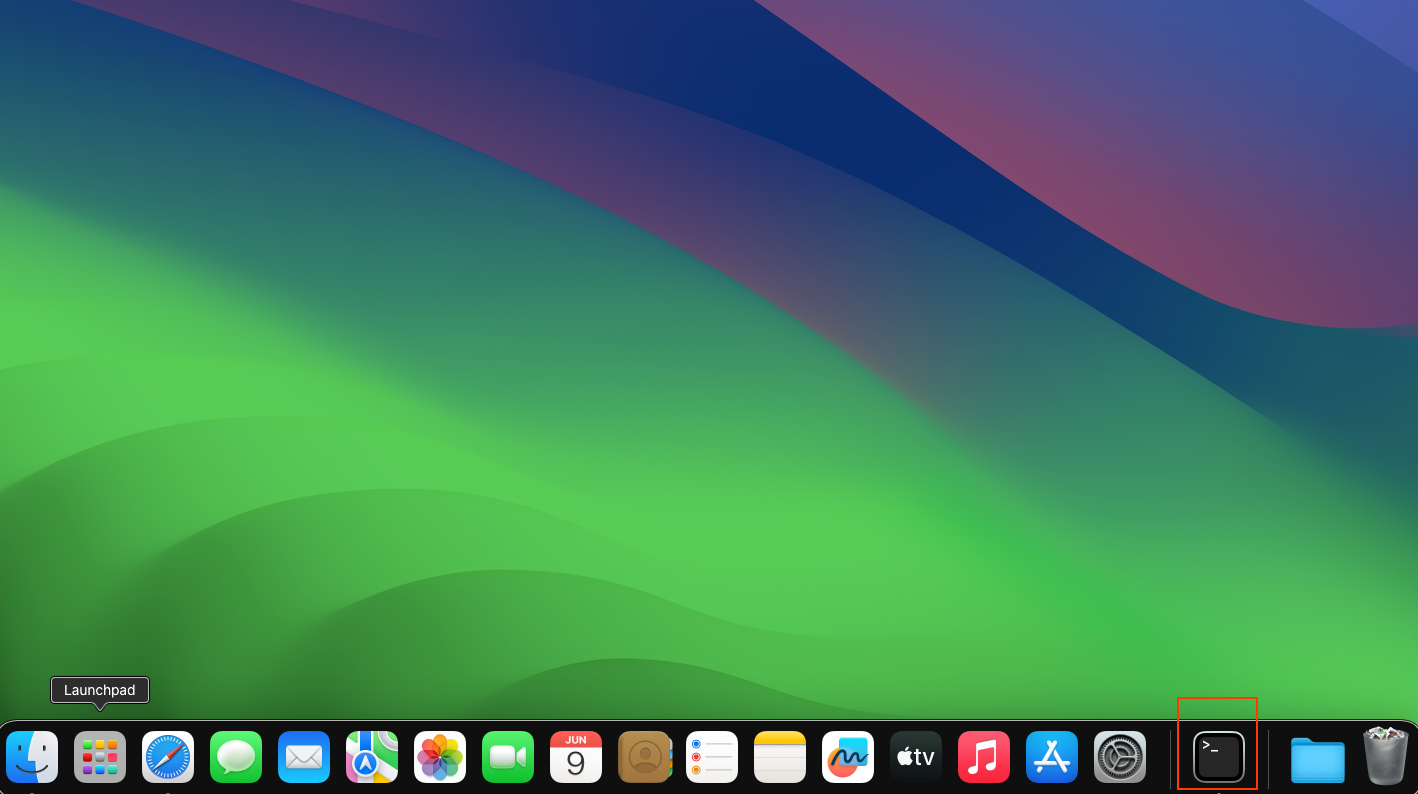
Copy the command into the terminal and hit enter:

Select 1) Proceed with standard installation or press enter
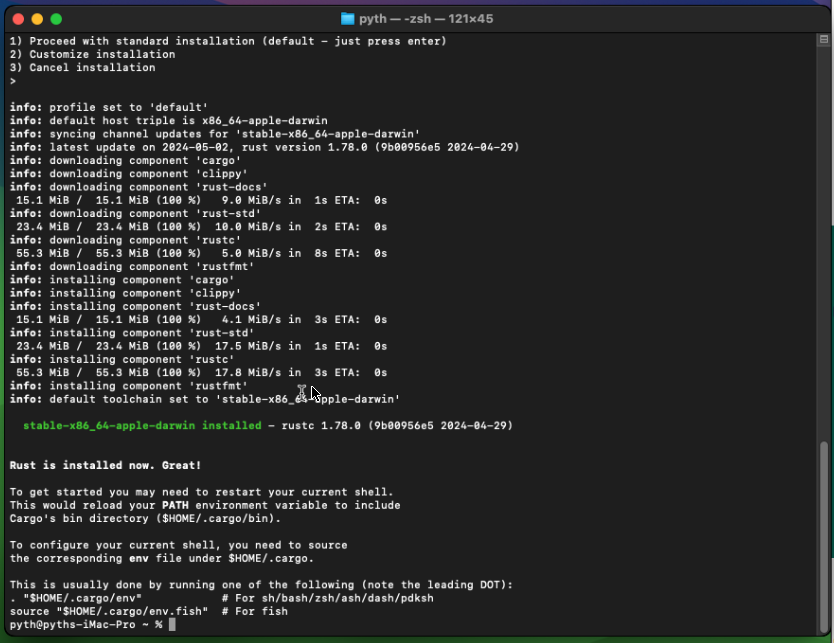
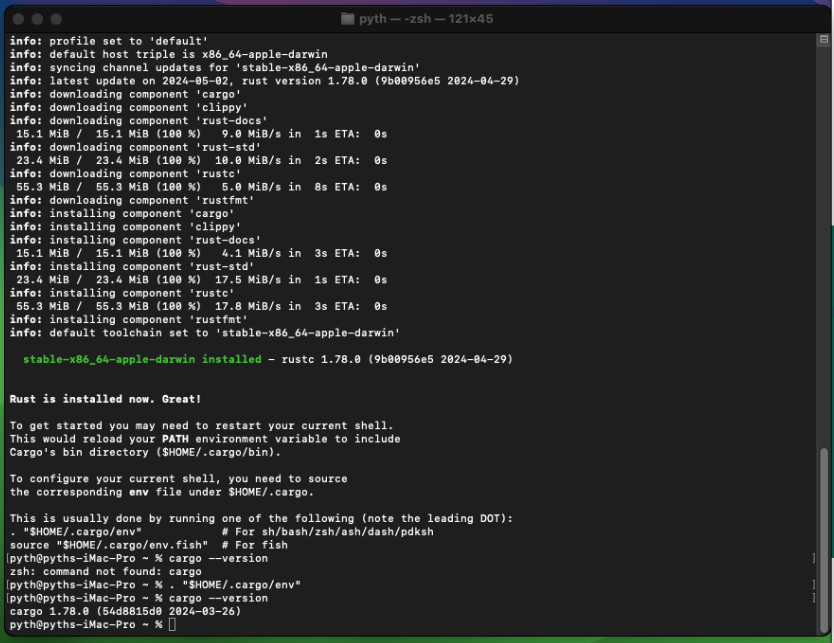
Rust is now installed you can enter this command and check cargo is well installed:
. "$HOME/.cargo/env"
then
cargo --version
Liana source code
Download the liana repository (source code):
git clone https://github.com/wizardsardine/liana.git
Note: if git is not yet installed on your system, you'll be prompted to accept to install it,
then you should re-run the command for clone the Liana repository.
Then cd into the liana repository:
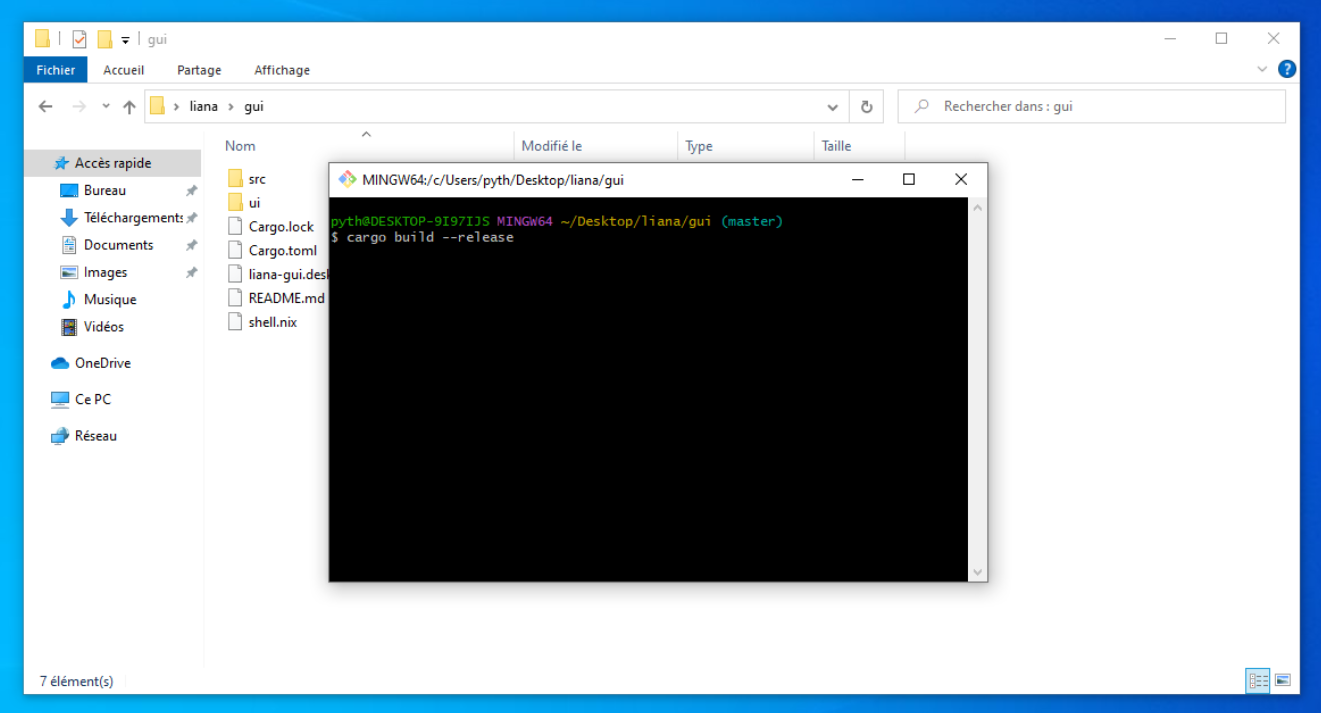
cd liana/gui
and build Liana:
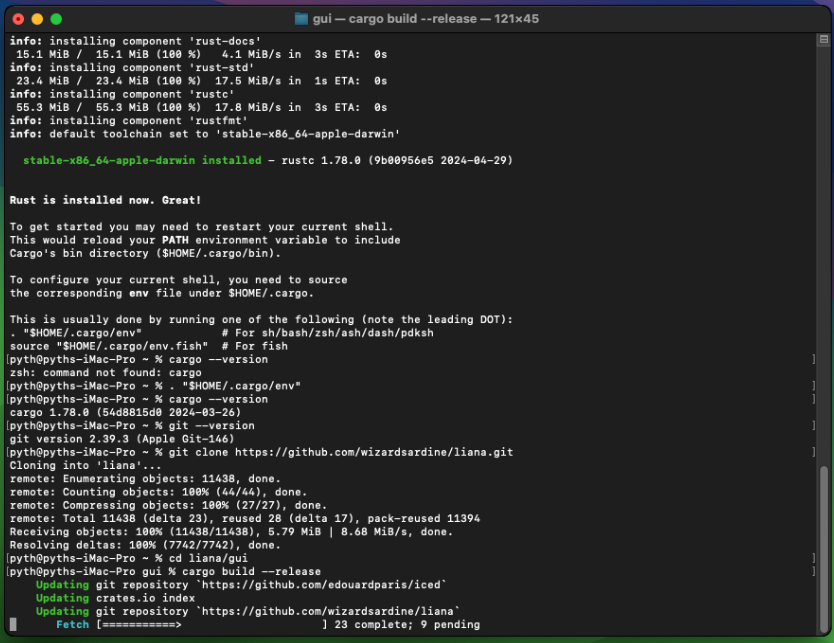
cargo build --release
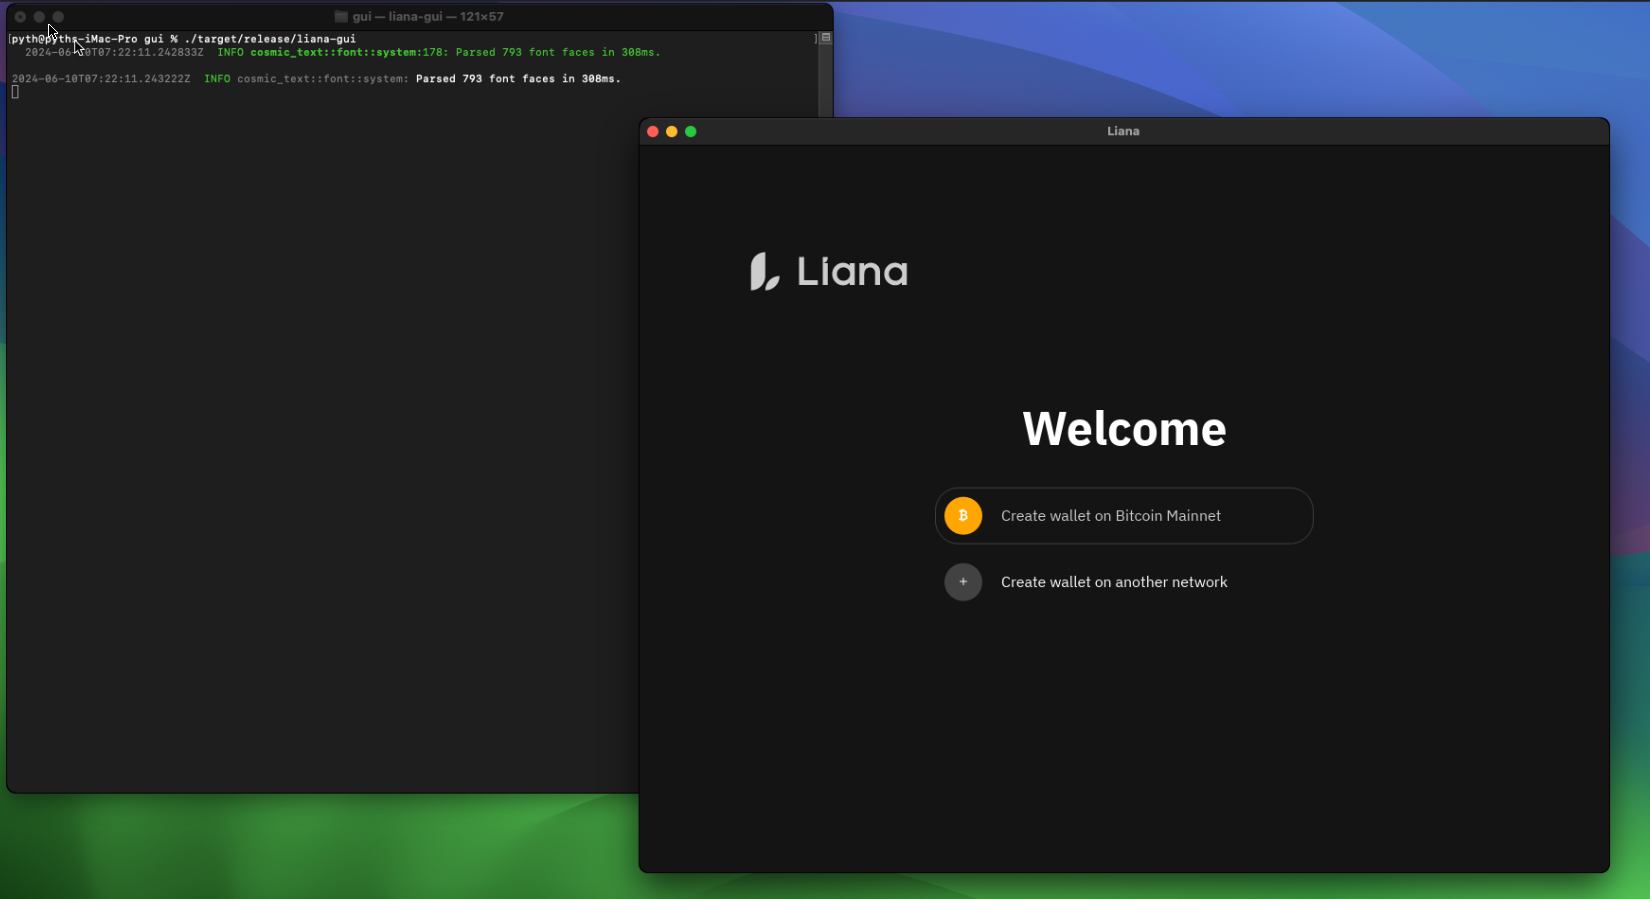
if the prompt ends up with this you are good:

you can now run liana w/ this command:
./target/release/liana-gui
Build Liana from sources on Windows 10
Rust toolchain
If you visit rust website you will find the method for install rust on your system:
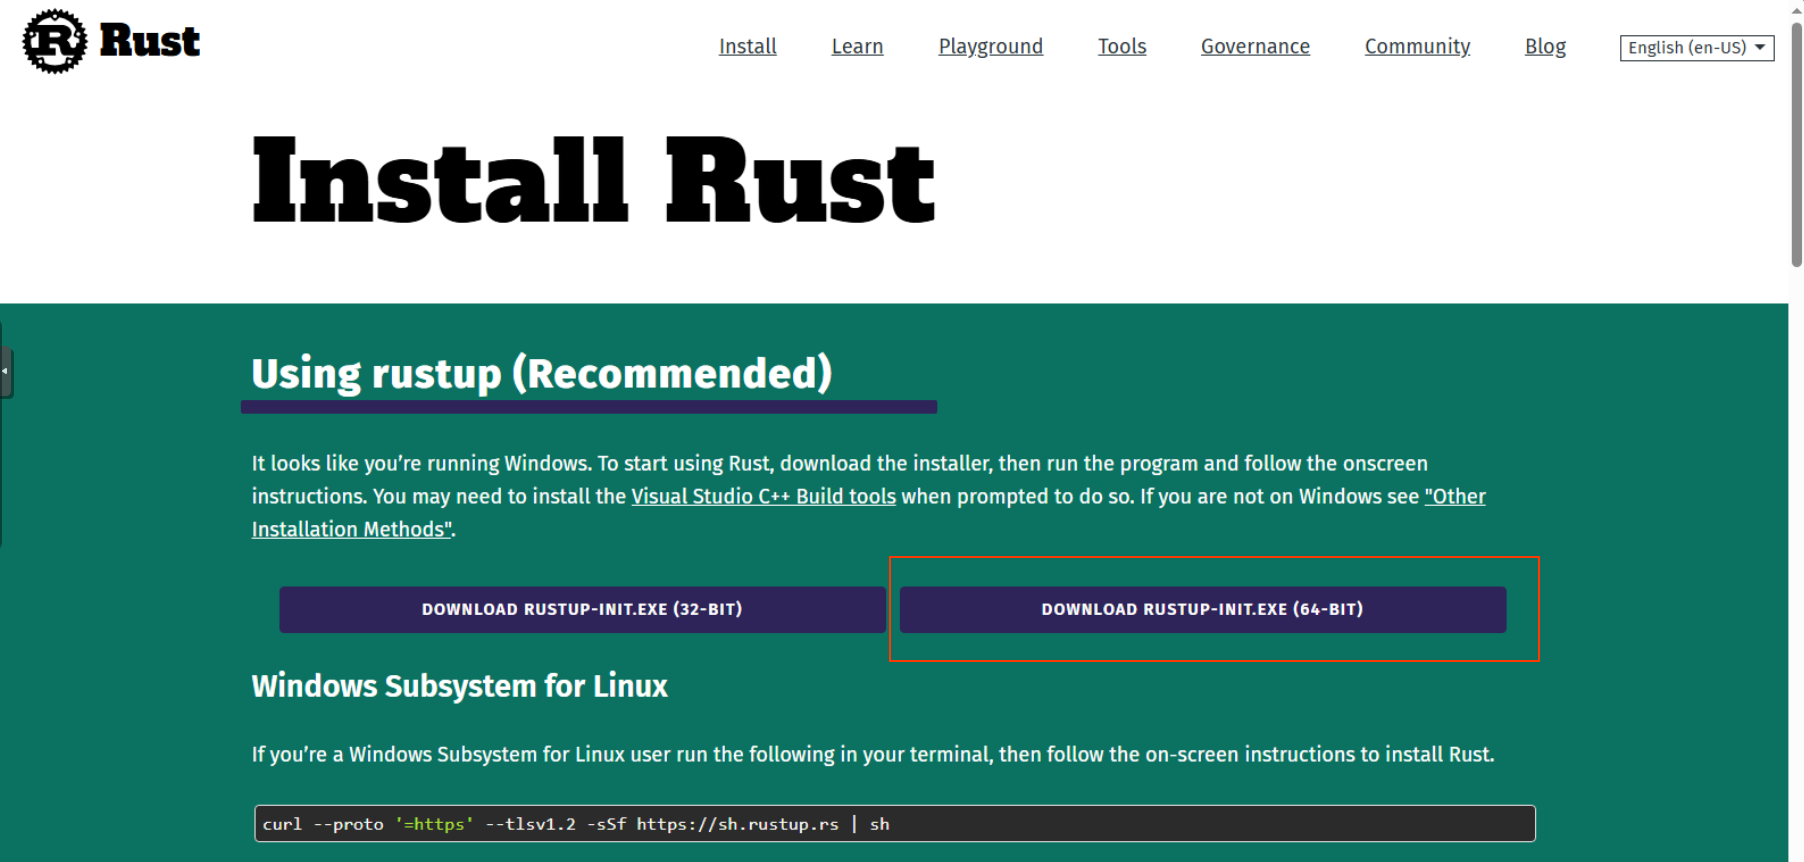
Download rust installer for your platform, its likely 64-bits one.
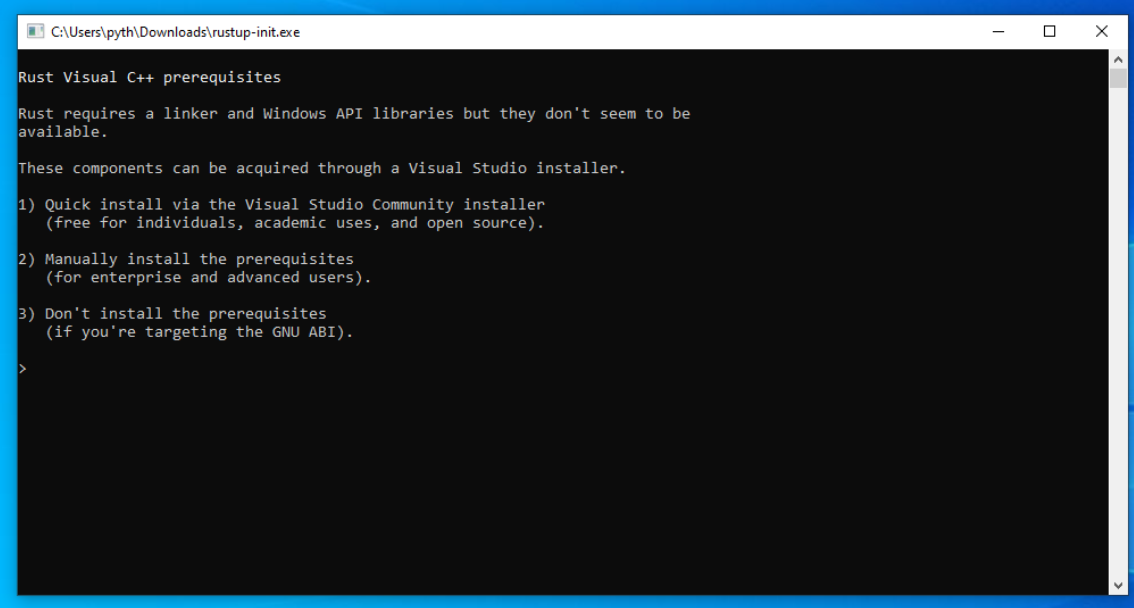
Execute it and choose the first option.
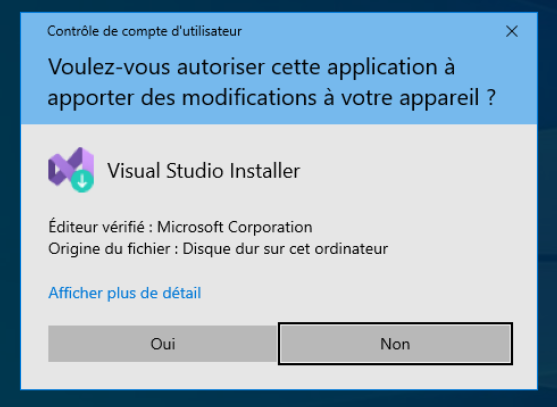
You'll be asked to install visual studio installer, do it and follow its install process.
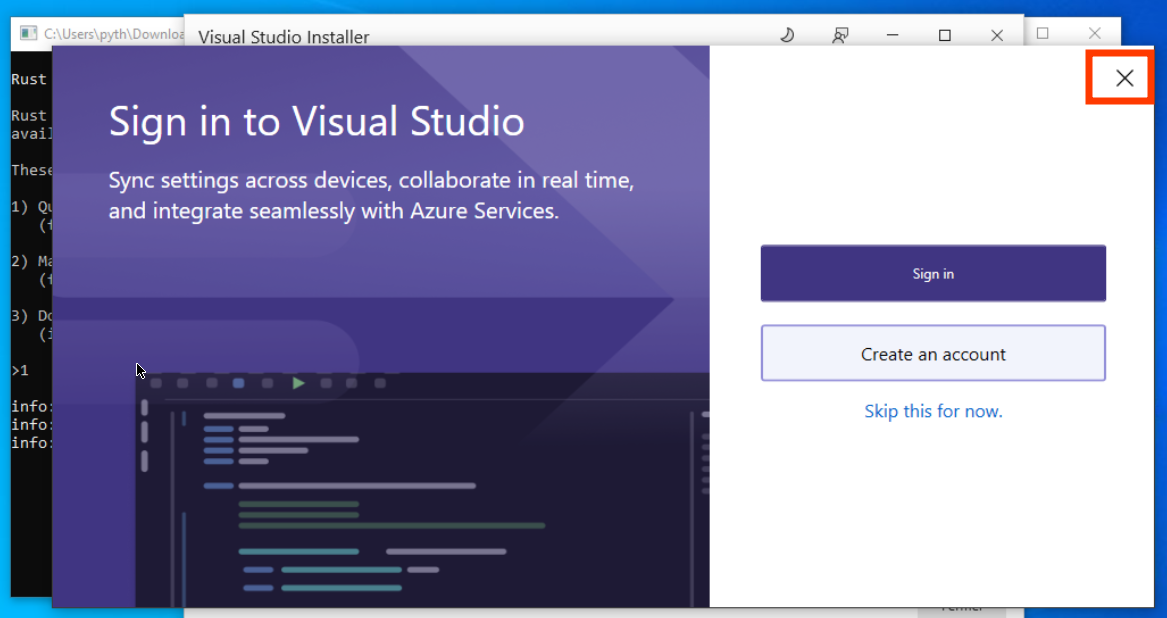
At this step, close visual studio.
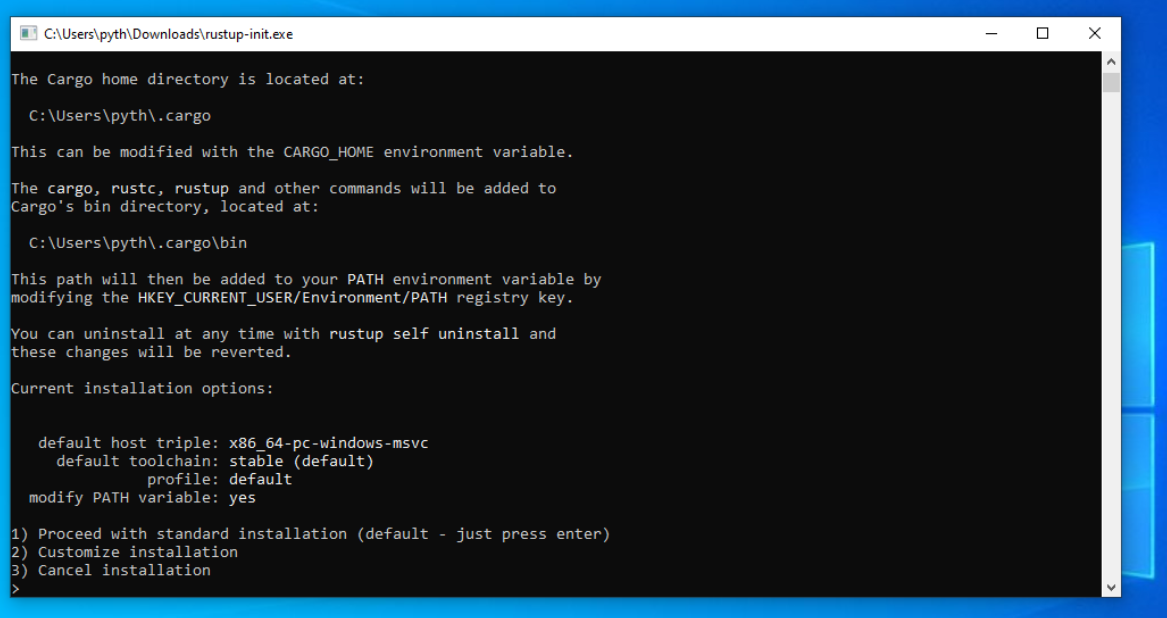
Choose the first option.
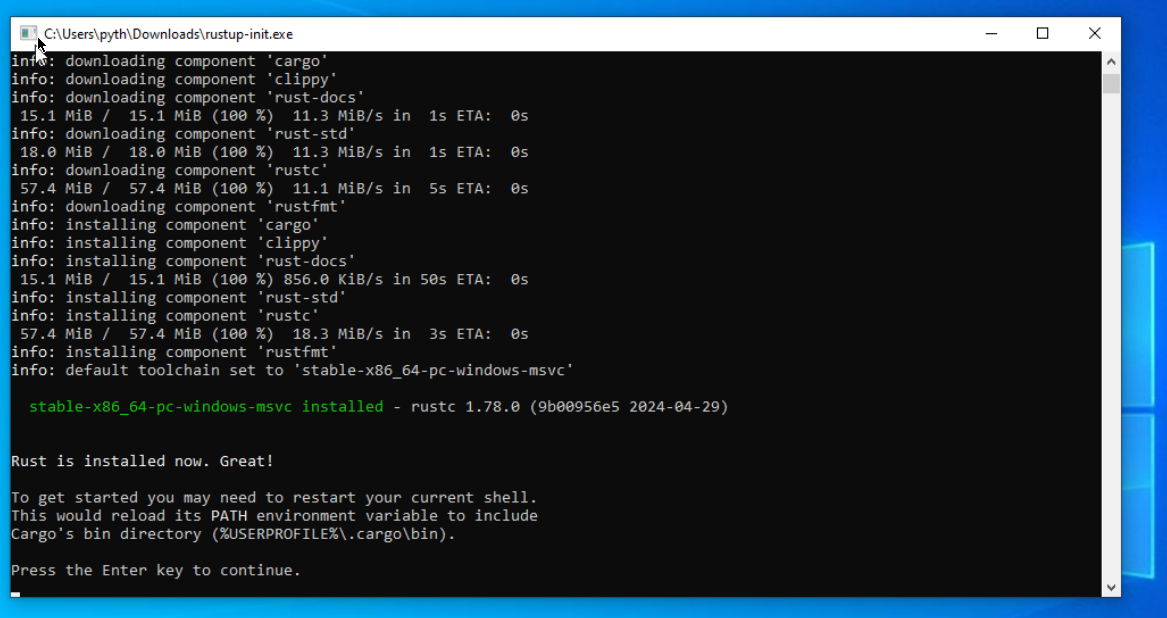
At this step in enter to close terminal.
Install Git

Go to git website in order to download its installer.
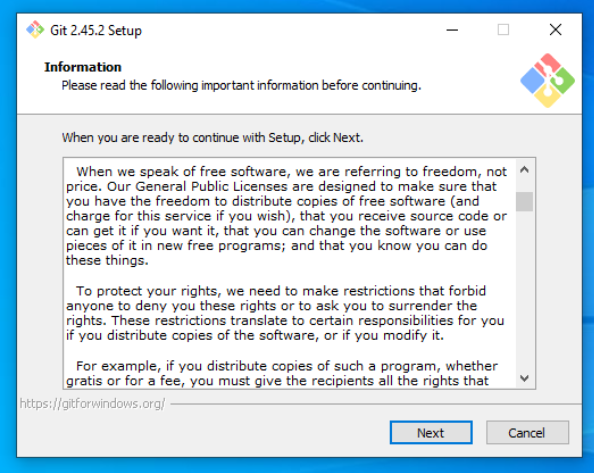
Then start installer.
and follow the installer step w/ defaults options.
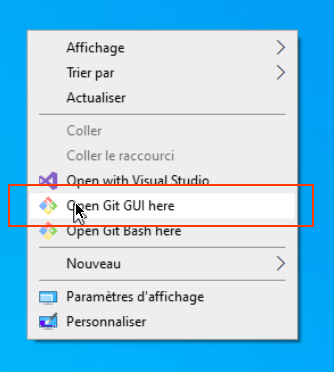
right click + open git gui
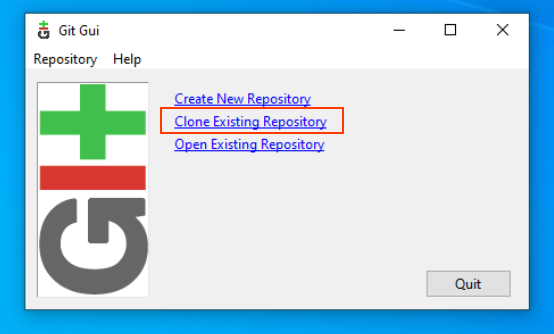
select "Clone Existing Repository"
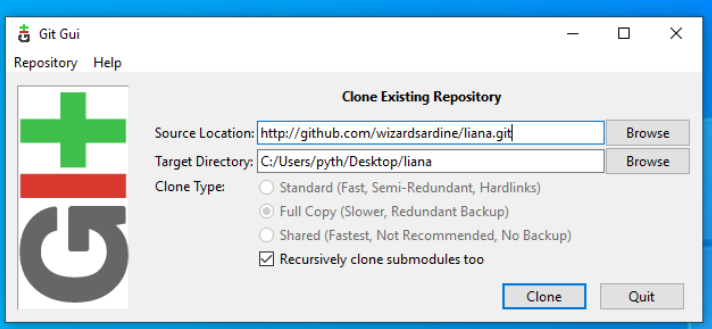
ENter liana repository address (https://github.com/wizardsardine/liana.git) and your target directory
ther click Clone.
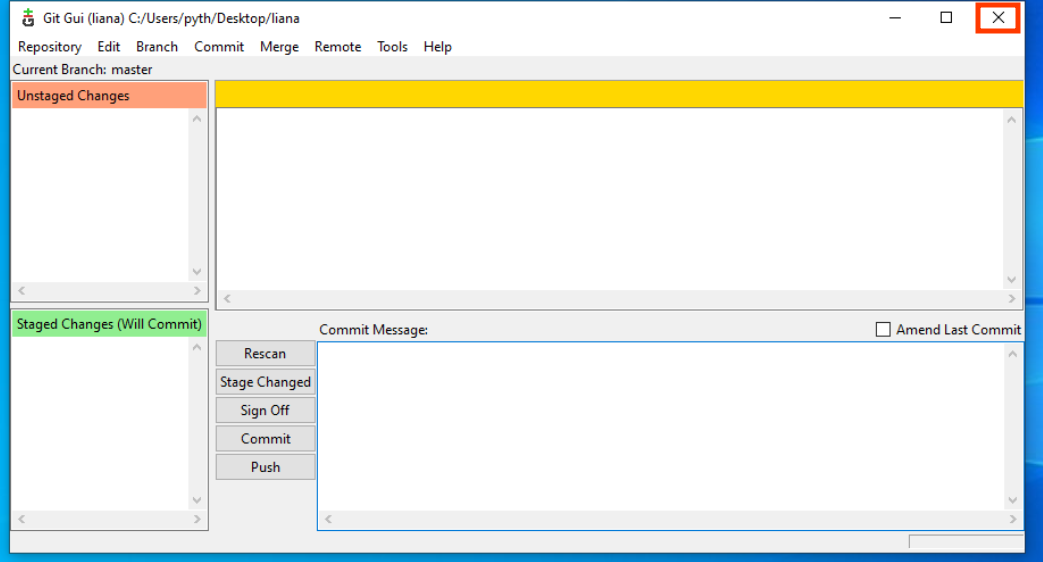
After download has finnish close Git Gui
open liana/gui folder
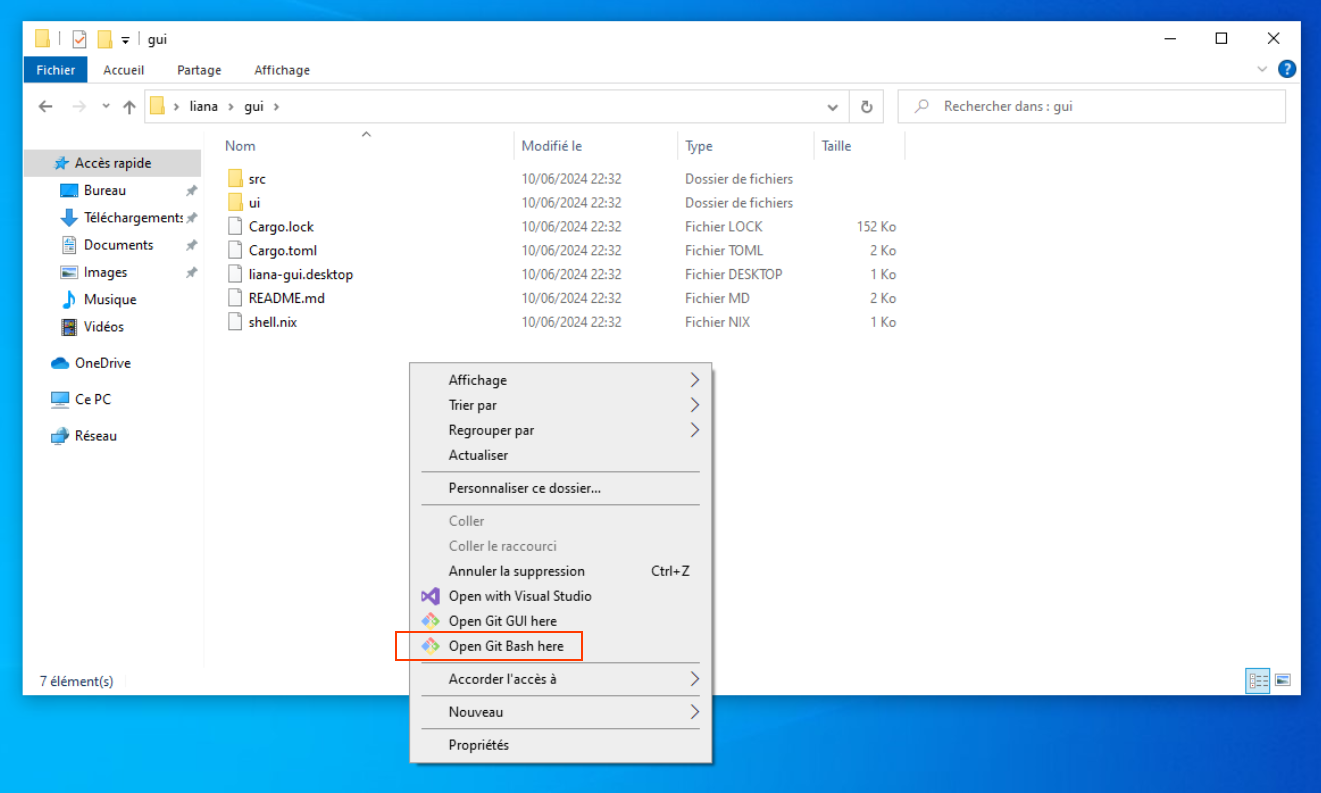
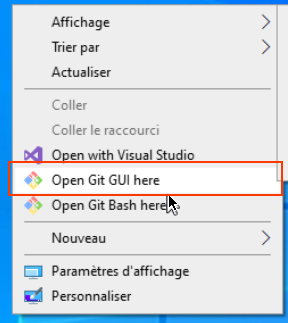
right click + open Git Bash
Type cargo build --release and hit enter.

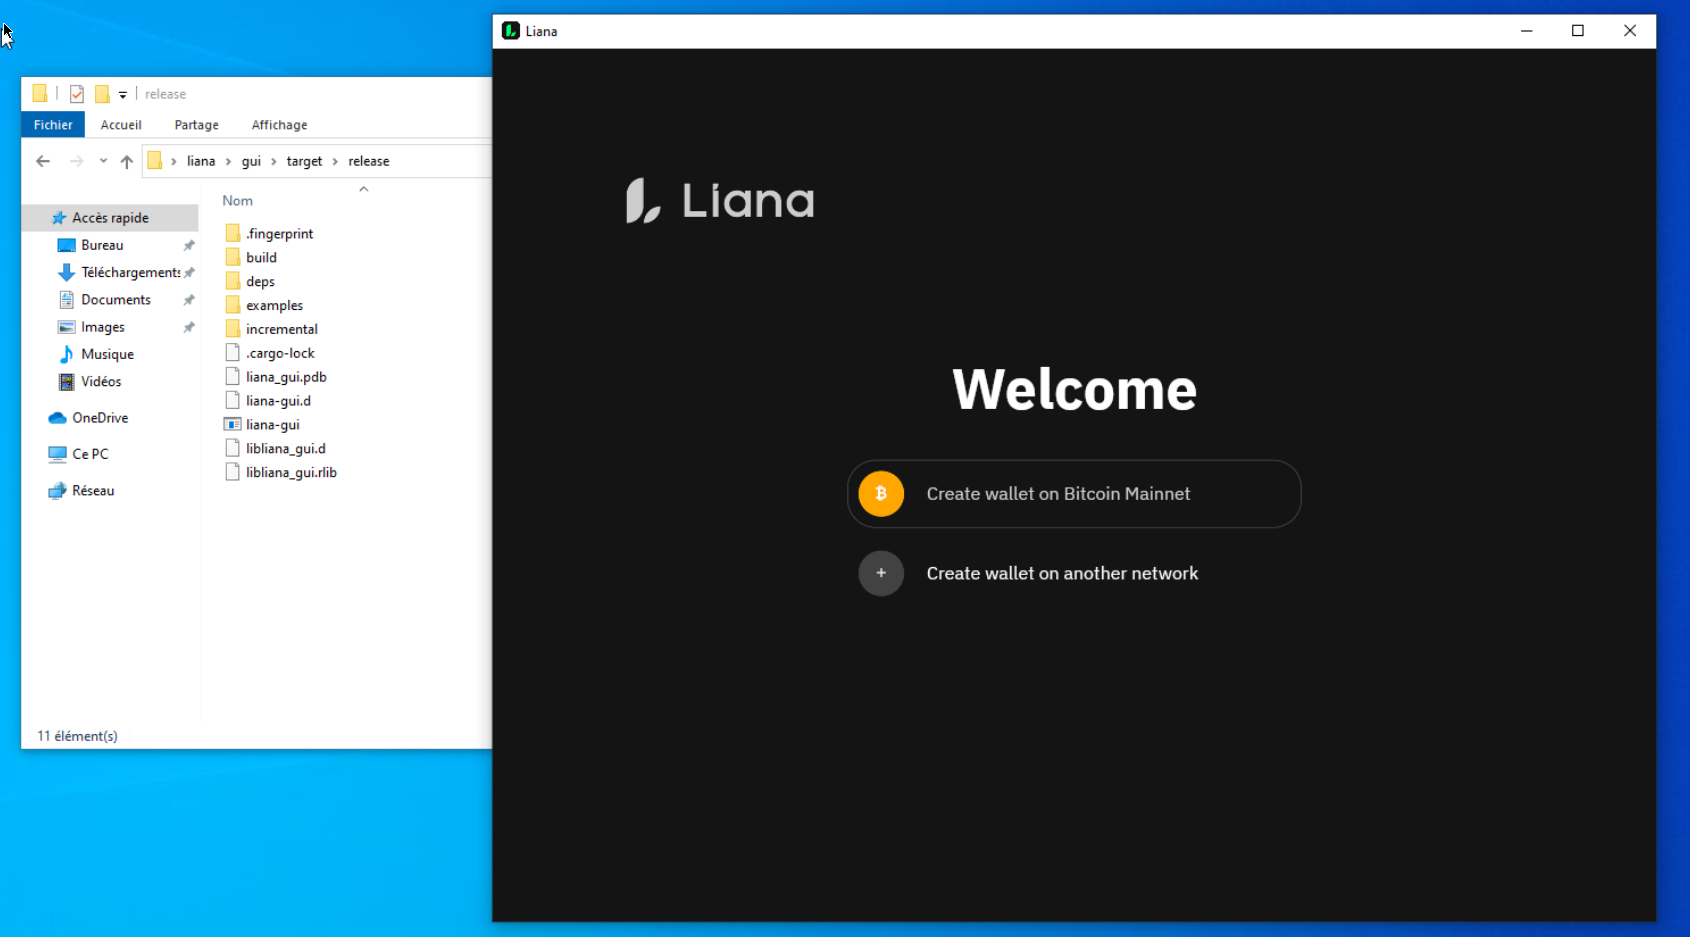
If you get this at the end of the build you are good, and can close the terminal!
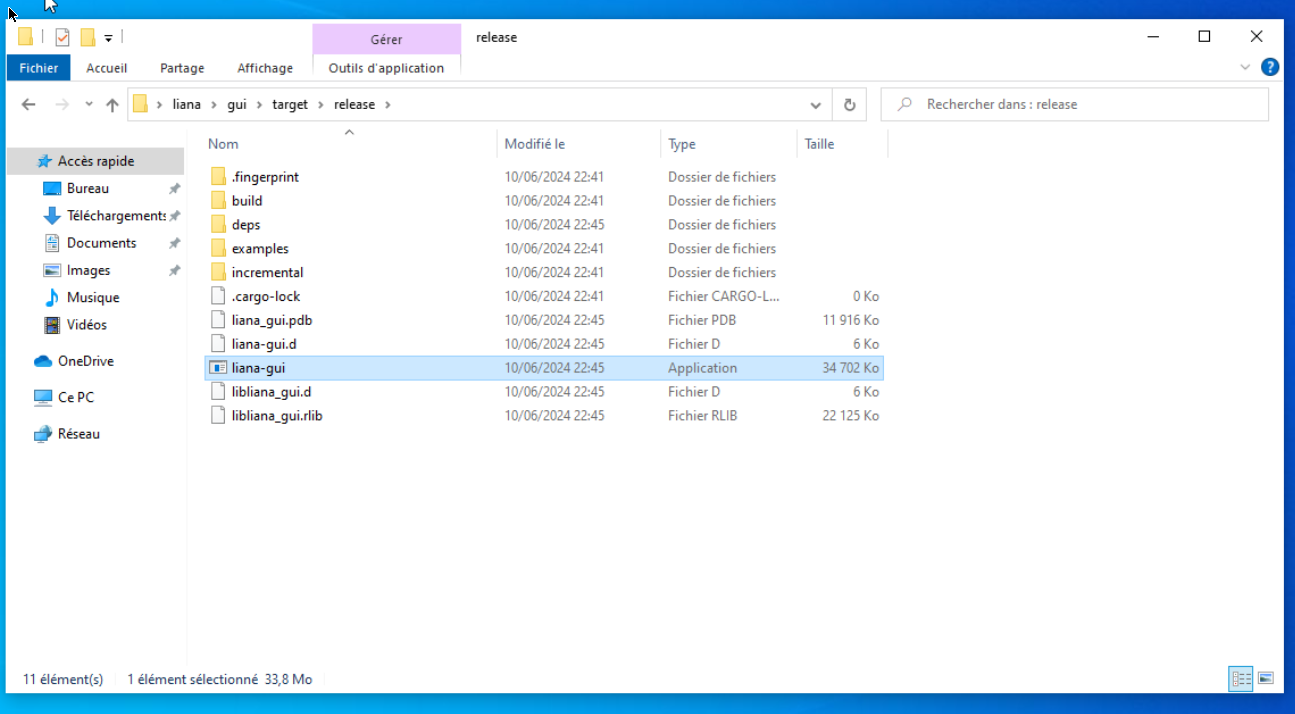
Then go to target/release directory and execute liana-gui
PGP with your Ledger Nano S
Using PGP with your Ledger Nano S, a physical device that stores a user’s private keys, which are used to access their digital assets. Usually they are used for store private keys related to cryptocurrencies like Bitcoin, in this article, we will discuss the benefits of using a hardware wallet to store PGP private keys, and why it is a better option than software-based storage solutions. We will provide a step-by-step guide on how to set up and use a Ledger Nano S for storing PGP private keys, and will explain why this method of storage is essential for anyone looking to secure their key with an easy to use hardware solution.
Install OpenPGP App on your Ledger Nano S
This article have been made under Ubuntu 22.04 LTS but might be reproducible with Ledger Nano S Plus and Ledger Nano X and with other Linux distro.
First you need to install OpenPGP App on your ledger:
- Connect your Ledger Nano and input your PIN
- Start Ledger Live
- Go to settings
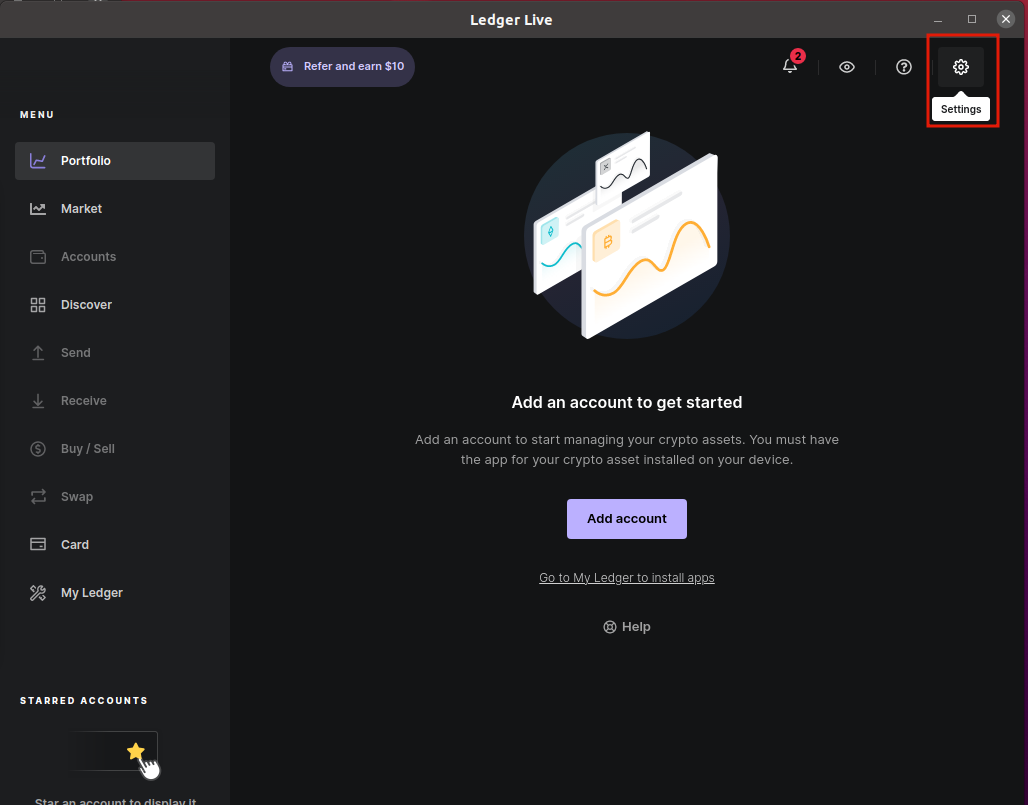
- Go to experimental features and enable Developer Mode
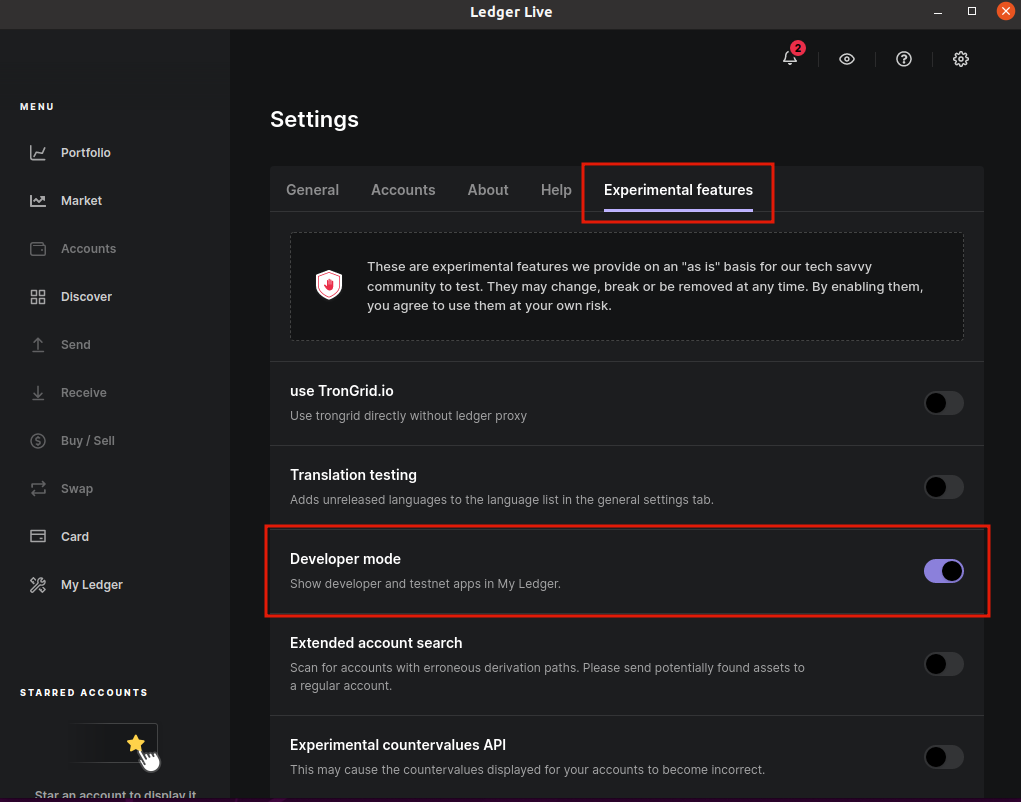
- Go to
My Ledger - Install OPenPGP app
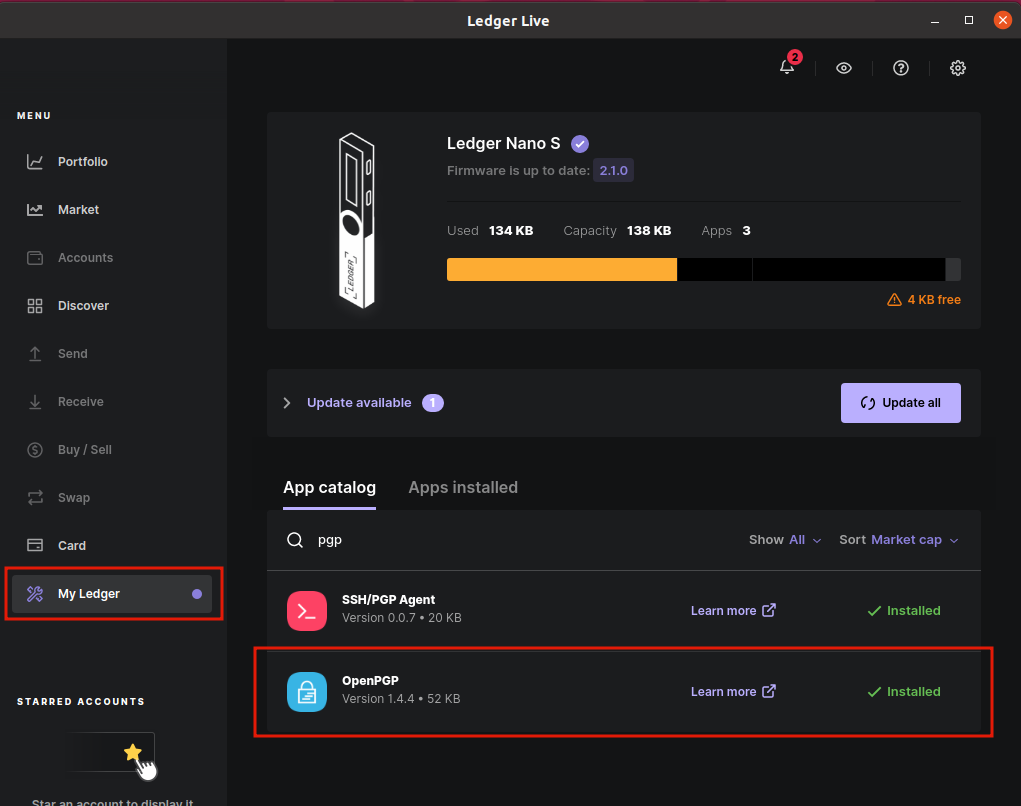
You can now start OpenPGP on your Ledger Hardware and follow the next steps.
Install PGP smartcards tools
pythcoiner@pythcoiner:~$ sudo apt install scdaemon pcscd pcsc-tools
pythcoiner@pythcoiner:~$ sudo systemctl enable pcscd
pythcoiner@pythcoiner:~$ sudo systemctl restart pcscd
- You can now launch OpenPGP app on your ledger Device
- Check the connection with the Ledger Nano S:
pythcoiner@pythcoiner:~$ pcsc_scan -r
0: Ledger Nano S [Nano S] (0001) 00 00
- Check the status
pythcoiner@pythcoiner:~$ gpg --card-status
Reader ...........: Ledger Nano S [Nano S] (0001) 00 00
Application ID ...: D2760001240103032C97EE1XXXX0000
Application type .: OpenPGP
Version ..........: 3.3
Manufacturer .....: unknown
Serial number ....: EE1XXXX6
Name of cardholder: [not set]
Language prefs ...: [not set]
Salutation .......:
URL of public key : [not set]
Login data .......: [not set]
Signature PIN ....: not forced
Key attributes ...: rsa2048 rsa2048 rsa2048
Max. PIN lengths .: 12 12 12
PIN retry counter : 3 0 3
Signature counter : 0
Signature key ....: [none]
Encryption key....: [none]
Authentication key: [none]
General key info..: [none]
NOTE: If you got this issue:
pythcoiner@pythcoiner:~$ gpg --card-status
gpg: selecting card failed: No such device
gpg: OpenPGP card not available: No such dev
or this one:
pythcoiner@pythcoiner:~$ pcsc_scan -r
SCardEstablishContext: Service not available.
you can try to restart pcscd
pythcoiner@pythcoiner:~$ sudo systemctl restart pcscd
NOTE2:
Since gpg v2.4 you should add disable-ccid option in scdaemon.conf (https://dev.gnupg.org/T6871)
NOTE3:
I experienced an issue (Ubuntu Server 22.04) where Nano S were detected but not NANO SP (Nano S+)
Looking at this issue and Ledger documentation i solve it by updating Ledger entries in /etc/libccid_Info.plist:
/etc/libccid_Info.plist details:
...

        <key>ifdVendorID</key>
        <array>

...

                <string>0x2C97</string>
                <string>0x2C97</string>
                <string>0x2C97</string>
                <string>0x2C97</string>
                <string>0x2C97</string>
                <string>0x2C97</string>

...

        </array>

        <key>ifdProductID</key>
        <array>

...

                <string>0x0001</string>
                <string>0x0004</string>
                <string>0x0005</string>
                <string>0x1009</string>
                <string>0x4009</string>
                <string>0x5009</string>

...

       </array>

        <key>ifdFriendlyName</key>
        <array>

...

                <string>Ledger Nano S</string>
                <string>Ledger Nano X</string>
                <string>Ledger Nano SP</string>
                <string>Ledger Nano S</string>
                <string>Ledger Nano X</string>
                <string>Ledger Nano S Plus</string>

...

    </array>

        <key>Copyright</key>

...
Configure your ledger
- You can edit the card data by this way:
pythcoiner@pythcoiner:~$ gpg --edit-card

Reader ...........: Ledger Nano S [Nano S] (0001) 00 00
Application ID ...: D2760001240103032C97EEXXXX0000
Application type .: OpenPGP
Version ..........: 3.3
Manufacturer .....: unknown
Serial number ....: EE1XXXX6
Name of cardholder: [not set]
Language prefs ...: [not set]
Salutation .......:
URL of public key : [not set]
Login data .......: [not set]
Signature PIN ....: not forced
Key attributes ...: rsa2048 rsa2048 rsa2048
Max. PIN lengths .: 12 12 12
PIN retry counter : 3 0 3
Signature counter : 0
Signature key ....: [none]
Encryption key....: [none]
Authentication key: [none]
General key info..: [none]

gpg/card> admin
Admin commands are allowed
- You can get the commands for edit:
gpg/card> help
quit           quit this menu
admin          show admin commands
help           show this help
list           list all available data
name           change card holder's name
url            change URL to retrieve key
fetch          fetch the key specified in the card URL
login          change the login name
lang           change the language preferences
salutation     change card holder's salutation
cafpr          change a CA fingerprint
forcesig       toggle the signature force PIN flag
generate       generate new keys
passwd         menu to change or unblock the PIN
verify         verify the PIN and list all data
unblock        unblock the PIN using a Reset Code
factory-reset  destroy all keys and data
kdf-setup      setup KDF for PIN authentication
key-attr       change the key attribute
- There is 2 pin access level, user(123456) and admin(12345678) lets first change its for obvious safety reasons:
gpg/card> passwd
gpg: OpenPGP card no. D27600XXXXXXXX032C97EE1XXXXX0000 detected

1 - change PIN
2 - unblock PIN
3 - change Admin PIN
4 - set the Reset Code
Q - quit

Your selection? 1
- Then fill in the old user password(123456) and choose a new one

- You can do the same for admin pin:
1 - change PIN
2 - unblock PIN
3 - change Admin PIN
4 - set the Reset Code
Q - quit

Your selection? 3
- Then you can change the name:
gpg/card> name
Cardholder's surname: maximalist
Cardholder's given name: Pythcoiner

gpg/card> list

Reader ...........: Ledger Nano S [Nano S] (0001) 00 00
Application ID ...: D2760001240103032C97EE1XXXXX0000
Application type .: OpenPGP
Version ..........: 3.3
Manufacturer .....: unknown
Serial number ....: EE1XXXX6
Name of cardholder: Pythcoiner maximalist
Language prefs ...: [not set]
Salutation .......:
URL of public key : [not set]
Login data .......: [not set]
Signature PIN ....: not forced
Key attributes ...: rsa2048 rsa2048 rsa2048
Max. PIN lengths .: 12 12 12
PIN retry counter : 3 0 3
Signature counter : 0
Signature key ....: [none]
Encryption key....: [none]
Authentication key: [none]
General key info..: [none]

gpg/card> quit
pythcoiner@pythcoiner:~$
Generate your PGP primary key and subkeys
For security reasons it is better to generate and keep you secret keys backup from a server not connected to the internet, and then only import the pubkeys on laptop you using on daily basis.
- It’s now time to generate your primary key from your secret server:
pythcoiner@pythcoiner:~$ gpg --quick-gen-key 'Pyhtcoiner <pythcoiner@proton.me>' rsa2048 cert 0y
We need to generate a lot of random bytes. It is a good idea to perform
some other action (type on the keyboard, move the mouse, utilize the
disks) during the prime generation; this gives the random number
generator a better chance to gain enough entropy.
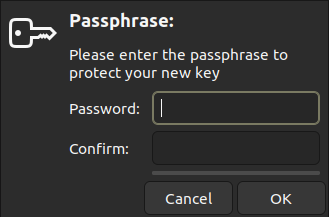
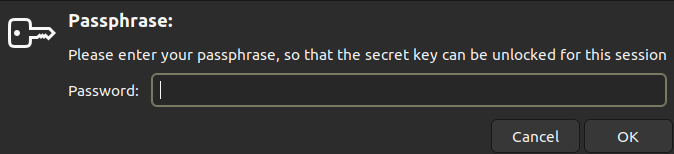
- Then you might to enter a passphrase:
gpg: revocation certificate stored as '/home/pythcoiner/.gnupg/openpgp-revocs.d/EB2FCD69E87A45A382E24E1A8FC419102C31FDC8.rev'
public and secret key created and signed.

Note that this key cannot be used for encryption.  You may want to use
the command "--edit-key" to generate a subkey for this purpose.
pub   rsa2048 2023-01-30 [C]
      EB2FCD69E87A45A382E24E1A8FC419102C31FDC8
uid                      Pyhtcoiner <pythcoiner@pyth.dev>
- You can list your keys:
pythcoiner@pythcoiner:~$ gpg -k
/home/pythcoiner/.gnupg/pubring.kbx
----------------------------
pub   rsa2048 2023-01-30 [C]
     EB2FCD69E87A45A382E24E1A8FC419102C31FDC8
uid           [ultimate] Pyhtcoiner <pythcoiner@proton.me>
This primary key have the certification function only, we need to generate subkeys with sign and encrypt functions:
- First generate the sign key, you might replace the pubkey (EB2FCD69E87A45A382E24E1A8FC419102C31FDC8) by yours:
pythcoiner@pythcoiner:~$ gpg --quick-addkey EB2FCD69E87A45A382E24E1A8FC419102C31FDC8 rsa2048 sign 0y
Enter your passphrase:
We need to generate a lot of random bytes. It is a good idea to perform
some other action (type on the keyboard, move the mouse, utilize the
disks) during the prime generation; this gives the random number
generator a better chance to gain enough entropy.
- Then generate encryption key, you might replace the pubkey (EB2FCD69E87A45A382E24E1A8FC419102C31FDC8) by yours:
pythcoiner@pythcoiner:~$ gpg --quick-addkey EB2FCD69E87A45A382E24E1A8FC419102C31FDC8 rsa2048 encr 0y
Enter your passphrase:
We need to generate a lot of random bytes. It is a good idea to perform
some other action (type on the keyboard, move the mouse, utilize the
disks) during the prime generation; this gives the random number
generator a better chance to gain enough entropy.
Backup your keys
This is a the most important part, you might to backup the keys to a safe place (a server not connected to the internet , ideally you generate the keys from this server and load it to your Ledger Nano, then only export the public key to the laptop you will use on daily basis) to recover them in case of loss or failure of your hardware device.
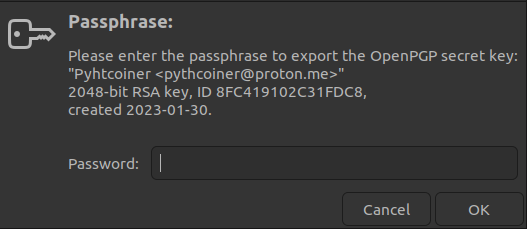
- First backup the master key:
pythcoiner@pythcoiner:~/.gpg_backup$ gpg -a --export-secret-keys pythcoiner@proton.me > secret_keys.gpg
Enter your passphrase
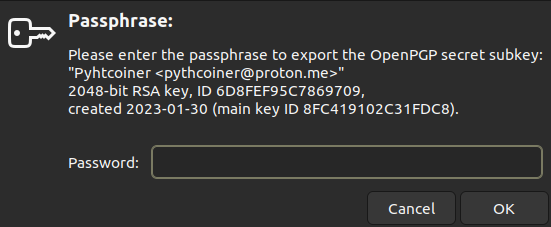
- Then backup subkeys:
pythcoiner@pythcoiner:~/.gpg_backup$ gpg -a --export-secret-subkeys pythcoiner@proton.me > secret_subkeys.gpg
Enter your passphrase again
Finally export your pubkey:
pythcoiner@pythcoiner:~/.gpg_backup$ gpg -a --export pythcoiner@proton.me > pubkey.gpg
Load your keys to your Ledger
- First go to the edit menu:
pythcoiner@pythcoiner:~$ gpg --edit-key pythcoiner@proton.me
gpg (GnuPG) 2.2.35; Copyright (C) 2022 g10 Code GmbH
This is free software: you are free to change and redistribute it.
There is NO WARRANTY, to the extent permitted by law.

Secret key is available.

sec  rsa2048/8FC419102C31FDC8
    created: 2023-01-30  expires: never       usage: C
    trust: unknown       validity: unknown
ssb  rsa2048/6D8FEF95C7869709
    created: 2023-01-30  expires: never       usage: S
ssb  rsa2048/8D7887D25E242C88
    created: 2023-01-30  expires: never       usage: E
[ unknown] (1). Pyhtcoiner <pythcoiner@proton.me>
- Select the first subkey:
gpg> key 1

sec  rsa2048/8FC419102C31FDC8
    created: 2023-01-30  expires: never       usage: C
    trust: unknown       validity: unknown
ssb* rsa2048/6D8FEF95C7869709
    created: 2023-01-30  expires: never       usage: S
ssb  rsa2048/8D7887D25E242C88
    created: 2023-01-30  expires: never       usage: E
[ unknown] (1). Pyhtcoiner <pythcoiner@proton.me>
- Load into SmartCard:
gpg> keytocard
Please select where to store the key:
  (1) Signature key
  (3) Authentication key
Your selection? 1
Enter you passphrase
sec  rsa2048/8FC419102C31FDC8
     created: 2023-01-30  expires: never       usage: C
     trust: unknown       validity: unknown
ssb* rsa2048/6D8FEF95C7869709
     created: 2023-01-30  expires: never       usage: S
ssb  rsa2048/8D7887D25E242C88
     created: 2023-01-30  expires: never       usage: E
[ unknown] (1). Pyhtcoiner <pythcoiner@proton.me>
- Unselect first subkey
gpg> key 1

sec  rsa2048/8FC419102C31FDC8
    created: 2023-01-30  expires: never       usage: C
    trust: unknown       validity: unknown
ssb  rsa2048/6D8FEF95C7869709
    created: 2023-01-30  expires: never       usage: S
ssb  rsa2048/8D7887D25E242C88
    created: 2023-01-30  expires: never       usage: E
[ unknown] (1). Pyhtcoiner <pythcoiner@proton.me>
- Select second subkey
gpg> key 2

sec  rsa2048/8FC419102C31FDC8
    created: 2023-01-30  expires: never       usage: C
    trust: unknown       validity: unknown
ssb  rsa2048/6D8FEF95C7869709
    created: 2023-01-30  expires: never       usage: S
ssb* rsa2048/8D7887D25E242C88
    created: 2023-01-30  expires: never       usage: E
[ unknown] (1). Pyhtcoiner <pythcoiner@proton.me>
- Load into SmartCard:
gpg> keytocard
Please select where to store the key:
   (2) Encryption key
Your selection? 2
- Enter passphrase
- then save
gpg> save
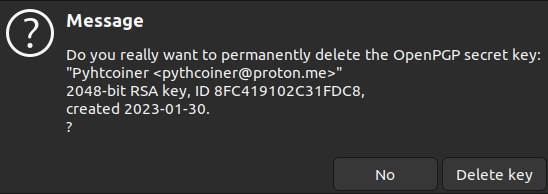
If you have generate your keys from your laptop or an unsecured pc, you might to transfer the backup to the secure location then delete the secret keys from your unsecured device:
pythcoiner@pythcoiner:~$ gpg --delete-secret-key pythcoiner@pyth.dev
gpg (GnuPG) 2.2.35; Copyright (C) 2022 g10 Code GmbH
This is free software: you are free to change and redistribute it.
There is NO WARRANTY, to the extent permitted by law.


sec  rsa2048/8FC419102C31FDC8 2023-01-30 Pyhtcoiner <pythcoiner@pyth.dev>

Delete this key from the keyring? (y/N) y
This is a secret key! - really delete? (y/N) y
Then valid on the pop-up window
Import PGP Pubkey on your laptop
- First move the backup of your public key and import it:
pythcoiner@pythcoiner:~$ gpg --import pubkey.gpg
gpg: key 8FC419102C31FDC8: public key "Pyhtcoiner <pythcoiner@proton.me>" imported
gpg: Total number processed: 1
gpg:               imported: 1
- Fetch your card data:
pythcoiner@pythcoiner:~$ gpg --card-edit
gpg/card> fetch
gpg/card> quit
- Then trust your key:
pythcoiner@pythcoiner:~$ gpg --edit-key pythcoiner@pyth.dev
gpg (GnuPG) 2.2.35; Copyright (C) 2022 g10 Code GmbH
This is free software: you are free to change and redistribute it.
There is NO WARRANTY, to the extent permitted by law.

Secret subkeys are available.

pub  rsa2048/8FC419102C31FDC8
    created: 2023-01-30  expires: never       usage: C
    trust: unknown       validity: unknown
ssb  rsa2048/6D8FEF95C7869709
    created: 2023-01-30  expires: never       usage: S
    card-no: 2C97 EE1XXXX6
ssb  rsa2048/8D7887D25E242C88
    created: 2023-01-30  expires: never       usage: E
    card-no: 2C97 EE1XXXX6
[ unknown] (1). Pyhtcoiner <pythcoiner@pyth.dev>

gpg> trust
pub  rsa2048/8FC419102C31FDC8
    created: 2023-01-30  expires: never       usage: C
    trust: unknown       validity: unknown
ssb  rsa2048/6D8FEF95C7869709
    created: 2023-01-30  expires: never       usage: S
    card-no: 2C97 EE1XXXX6
ssb  rsa2048/8D7887D25E242C88
    created: 2023-01-30  expires: never       usage: E
    card-no: 2C97 EE1XXXX6
[ unknown] (1). Pyhtcoiner <pythcoiner@pyth.dev>

Please decide how far you trust this user to correctly verify other users' keys
(by looking at passports, checking fingerprints from different sources, etc.)

 1 = I don't know or won't say
 2 = I do NOT trust
 3 = I trust marginally
 4 = I trust fully
 5 = I trust ultimately
 m = back to the main menu

Your decision? 5
Do you really want to set this key to ultimate trust? (y/N) y

pub  rsa2048/8FC419102C31FDC8
    created: 2023-01-30  expires: never       usage: C
    trust: ultimate      validity: unknown
ssb  rsa2048/6D8FEF95C7869709
    created: 2023-01-30  expires: never       usage: S
    card-no: 2C97 EE1XXXX6
ssb  rsa2048/8D7887D25E242C88
    created: 2023-01-30  expires: never       usage: E
    card-no: 2C97 EE1XXXX6
[ unknown] (1). Pyhtcoiner <pythcoiner@pyth.dev>
Please note that the shown key validity is not necessarily correct
unless you restart the program.

gpg> quit
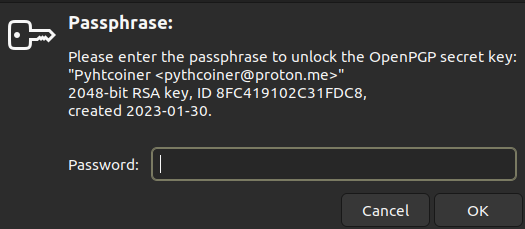
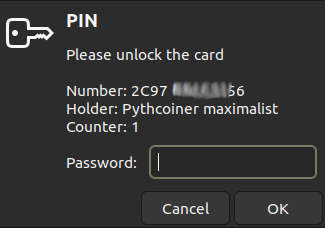
- You can now try to sign a file with GPG and your key stored on your Ledger Nano S:
pythcoiner@pythcoiner:~$ gpg --detach-sign file.txt
- This window might pop-up and ask you unlock the card
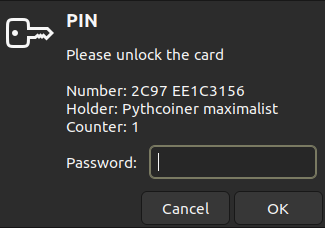
- Now deconnect your Ledger Nano S from your laptop, then retry sign:
pythcoiner@pythcoiner:~$ gpg --detach-sign file.txt
This window might pop up and signature fail
You now know how touse pgp with your ledger, then you can learn how to use a password Manager with PGP!
This article have been made with help of this sources:
- Using your Ledger Nano to authenticate you SSH connections | Ledger Blog link
- GPG : comment créer une paire de clefs presque parfaite link
- Clefs GPG : comment les stocker et les utiliser via une clef USB OpenPGP Card ? link
Using your password manager with PGP
Why use a password manager with PGP?
Managing multiple today can be a daunting task, especially with the increasing number of online accounts. It is challenging to remember all these passwords, and this is where password managers come in handy. Your password managerwith PGP securely stores all your passwords in one location. It allow you to access them easily . This makes it much easier and more convenient to manage your online accounts, while also enhancing your security.
However, if you simply store your passwords directly in a browser is not a safe method of password management. Browsers are vulnerable to various security threats, such as malware, phishing attacks, and hacking. If a hacker gains access to your computer, they can easily retrieve your stored passwords, putting your online accounts at risk of being compromised. This can lead to identity theft and financial loss. In addition, if your computer is lost or stolen, your passwords are easily accessible to whoever got it.
How to improve?
This is where PGP (Pretty Good Privacy) encryption comes in. PGP is a widely used encryption standard for secure communication and data storage. By combining the use of a password manager with PGP encryption, you can ensure that your passwords are protected against unauthorized access. In the last article, we dig into how to use PGP encryption and store the keys on an Ledger Nano Hardware Wallet. Now we will take it a step further by using an password manager with the previous setup. We will add an additional layer of security as it ensures that even if your computer is compromised, the password are still safe, your passwords cannot be decrypted without physical access to the hardware device.
Whether you are new to password managers or simply looking to upgrade your security, we will provide you with all the information you need to get started with PGP-secured password management using hardware storage. By following these steps, you can rest assured that your passwords are safe and secure.
We made this article under Ubuntu 22.04 LTS but might be reproducible with other Linux distro.
Using PASS
PASS is a standard Unix password manager that is used to securely store passwords, secrets, and other sensitive information. It ‘s open-source software, which means that anyone can check the source code. PASS is a password manager with PGP encryption to ensure that all stored information is secure and can only be accessed with a passphrase. Pass used Git for remote backups. The software is easy to use and offers a simple command-line interface that makes it easy to manage passwords . You can learn more about PASS here.
Why Choosing PASS
- Open Source: Pass is an Open Source project, followed by a huge community.
- Stable project: First Pass release from 2012, actively maintained.
- Migration tools: A bunch of migration tools are available for migrate from many other password managers.
- Cross-Platform: Pass is available on all the main platforms, Linux, MAC, Windows.
- Unix Philosophy: Pass follow the Keep It Simple paradigm.
- GUI Client: Many GUI client available for all desktop and mobile platforms.
Install PASS
Prior to install pass, you might have git installed:
pythcoiner@pythcoiner:~$ sudo apt install -y git
Then you can install pass:
pythcoiner@pythcoiner:~$ sudo apt install -y p
Configure PASS
Prior to configure pass, you need to get your PGP pubkey:
pythcoiner@pythcoiner:~$ gpg -K
/home/pythcoiner/.gnupg/pubring.kbx
-----------------------------------
sec   rsa2048 2023-02-05 [C]
      37833B5FC36137944ACCF1FD89197BAEF074F4F2
uid           [ultimate] Pythcoiner <pythcoiner@proton.me>
ssb   rsa2048 2023-02-05 [S]
ssb   rsa2048 2023-02-05 [E]
Now you can initialize pass:
pythcoiner@pythcoiner:~$ pass init "37833B5FC36137944ACCF1FD89197BAEF074F4F2"
mkdir: created directory '/home/pythcoiner/.password-store/'
Password store initialized for 37833B5FC36137944ACCF1FD89197BAEF074F4F
pass as made a new directory for store our encrypted password at /home/pythcoiner/.password-store/
Lets have a look there
pythcoiner@pythcoiner:~$ cd  /home/pythcoiner/.password-store/
pythcoiner@pythcoiner:~/.password-store$ ls -a
.  ..  .gpg-id
pythcoiner@pythcoiner:~/.password-store$ cat .gpg-id
37833B5FC36137944ACCF1FD89197BAEF074F4F2
pythcoiner@pythcoiner:~/.password-store$
We can now init the git repo if you plan to use the remote backup function:
First of all if you not yet configure git , define name and email that will be supplied on git commits:
pythcoiner@pythcoiner:~$ git config --global user.email "pythcoiner@pyth.dev"
pythcoiner@pythcoiner:~$ git config --global user.name "pythcoiner"
Then init the git repo with pass
pythcoiner@pythcoiner:~/.password-store$ pass git init
hint: Using 'master' as the name for the initial branch. This default branch name
hint: is subject to change. To configure the initial branch name to use in all
hint: of your new repositories, which will suppress this warning, call:
hint:
hint: 	git config --global init.defaultBranch <name>
hint:
hint: Names commonly chosen instead of 'master' are 'main', 'trunk' and
hint: 'development'. The just-created branch can be renamed via this command:
hint:
hint: 	git branch -m <name>
Initialized empty Git repository in /home/pythcoiner/.password-store/.git/
[master (root-commit) 9145223] Add current contents of password store.
 2 files changed, 2 insertions(+)
 create mode 100644 .gitattributes
 create mode 100644 .gpg-id
pythcoiner@pythcoiner:~/.password-store$
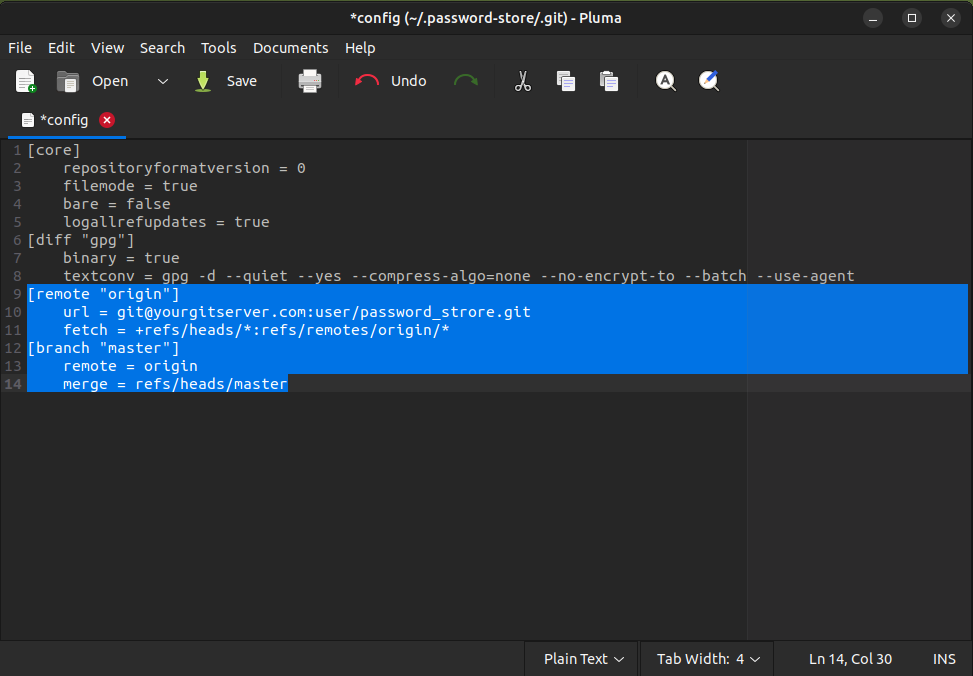
Now edit git repo config file at ~/.password-store/.git/config:
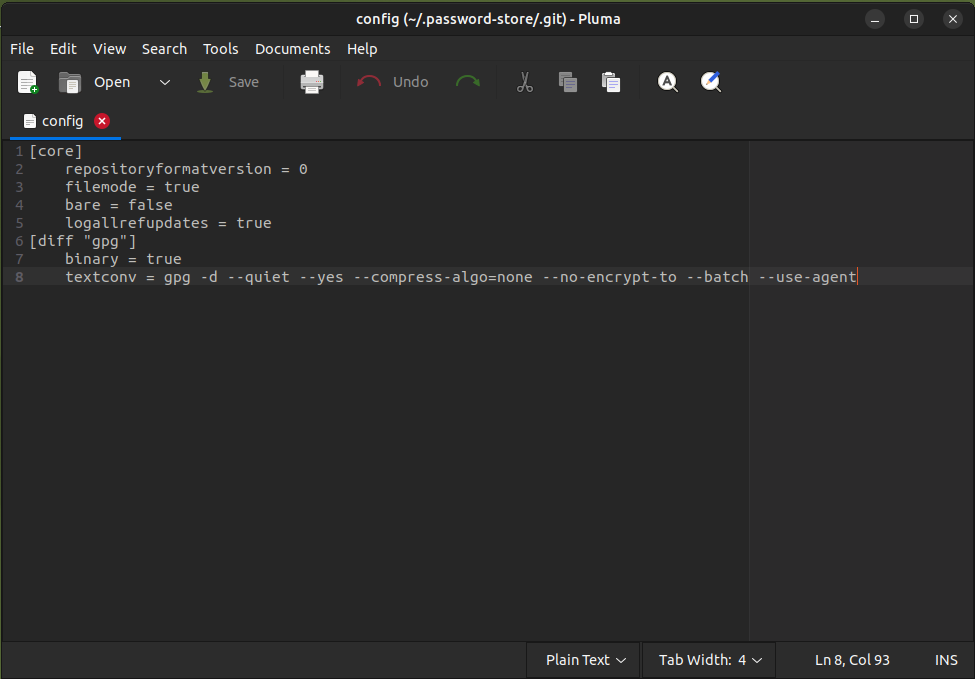
and add remote server data:
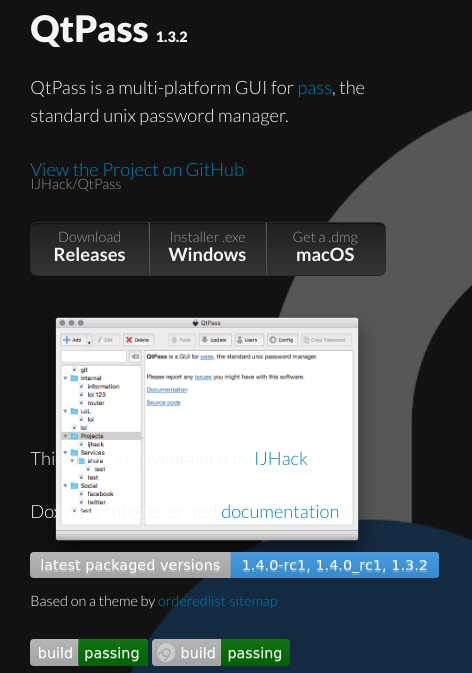
Using QtPass as Graphical User Interface for PASS:
We will now show you how to use pass with QtPass GUI Client, QtPass is a cross-platform client, have a simple GUI interface and can handle several profiles using different pubkeys, with that, you can easily manage both your private and professional passwords with the same tool! You can learn more about QtPass here.
First of all lets install QtPass:
pythcoiner@pythcoiner:~/.password-store/.git$ sudo apt install -y qtpass
Then you can run QtPass by using this command:
pythcoiner@pythcoiner:~/.password-store/.git$ qtpass
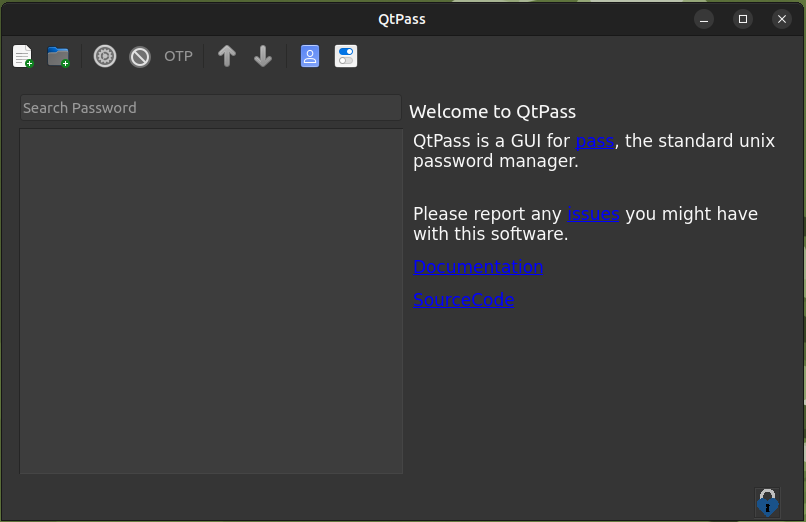
You can now use the right click or the GUI buttons for add folders or passwords (each password is stored in a separate encrypted file)
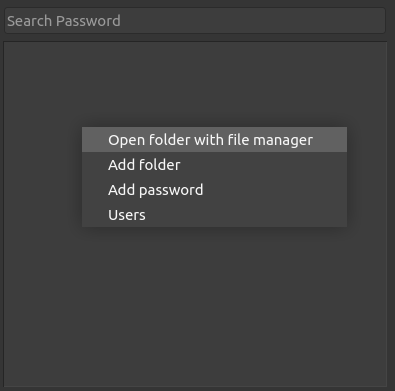
You can also set several profiles (each profile can use a different pubkey. Then just need to copy the empty initial .password-store/ folder then edit ./git/config and .pgp-id files for fill your new git server backup location and new pubkey!o
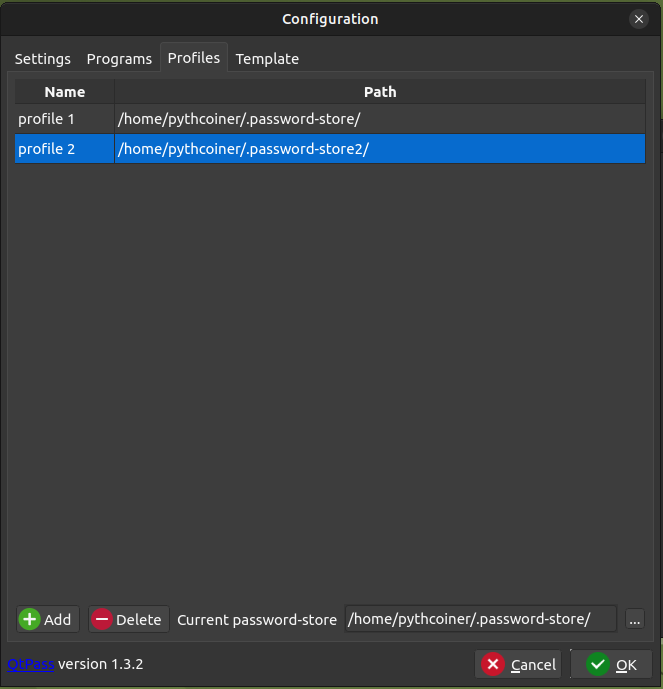
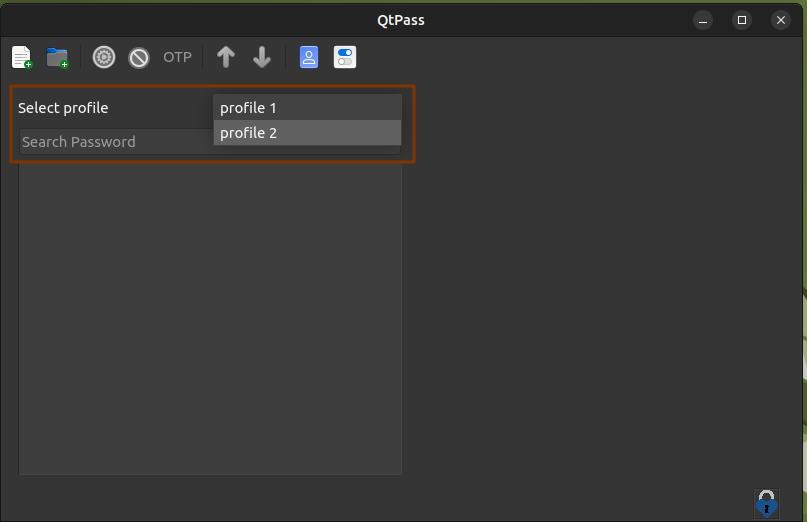
It is then quite easy to switch between profiles:
MacOS Vm on Proxmox server
I agree it sucks that (too much) people use closed source secure-advertised-only (trust me bro) OSs, but in the end, we build software for users, so we have to make it work on the platform they use, and it means also testing properly on the platform they use.
Proxmox
Proxmox is a Virtual Machine manager implementation, a minimal Debian OS with an admin interface to spawn VMs. This post will show you a step-by-step flow to build a MacOS VM for Proxmox.
What you need
- A KVM-OpenCore *.iso image, you can get the latest here
- A MacOS *.iso image
- An already running proxmox server, I'll assume here that you are familliar managing a Proxmox server.
You should first upload OpenCore and you MacOS image to your Proxmox Server.
Install KVM-OpenCore
KVM OpenCore is a virtualized implementation of the OpenCore bootloader, typically used to run macOS on Linux-based systems via KVM (Kernel-based Virtual Machine). This setup enables users to create a macOS virtual machine with near-native performance, leveraging OpenCore to manage the macOS boot process in a virtual environment.
General Tab
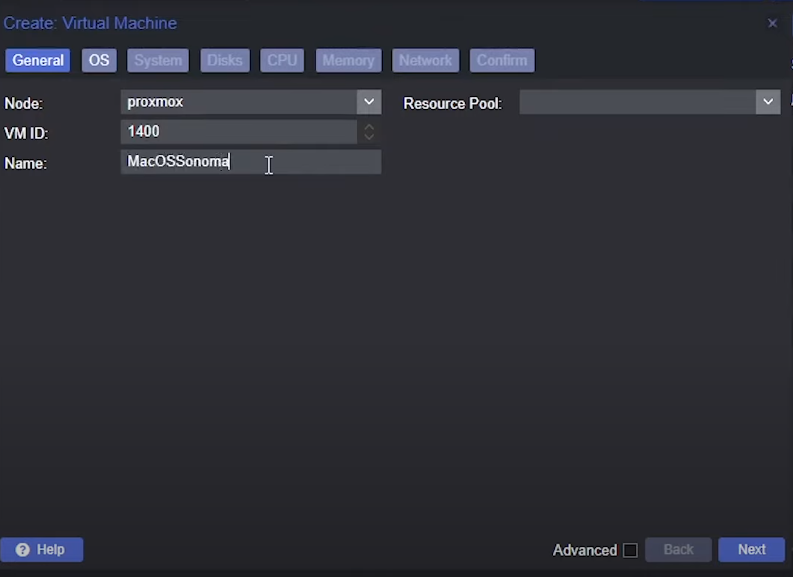
-
Choose a name for the VM.
-
The VM ID is not very important here, it should just be unique.
OS Tab
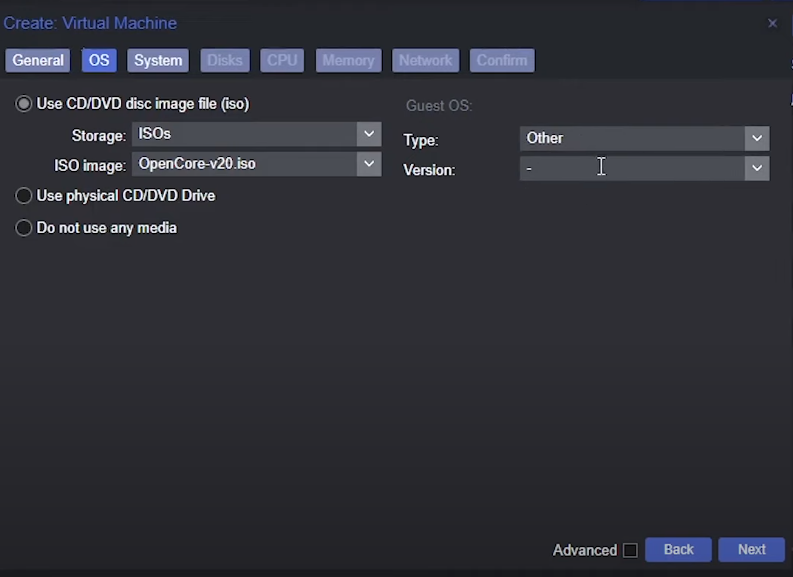
- Select the Opencore image you have previously installed
- Set Guest OS type to
Other
System Tab
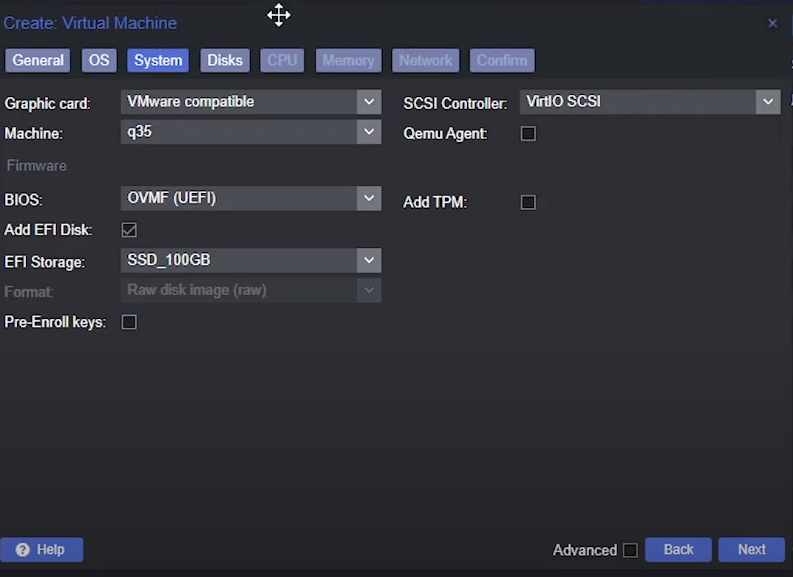
- Graphic card:
VMware compatible - Machine:
q35 - BIOS:
OVMF (UEFI) - Check
Add EFI disk - Select a storage
- Uncheck
Pre-Enroll keys - SCSI:
VirtIO SCSI
Disks Tab
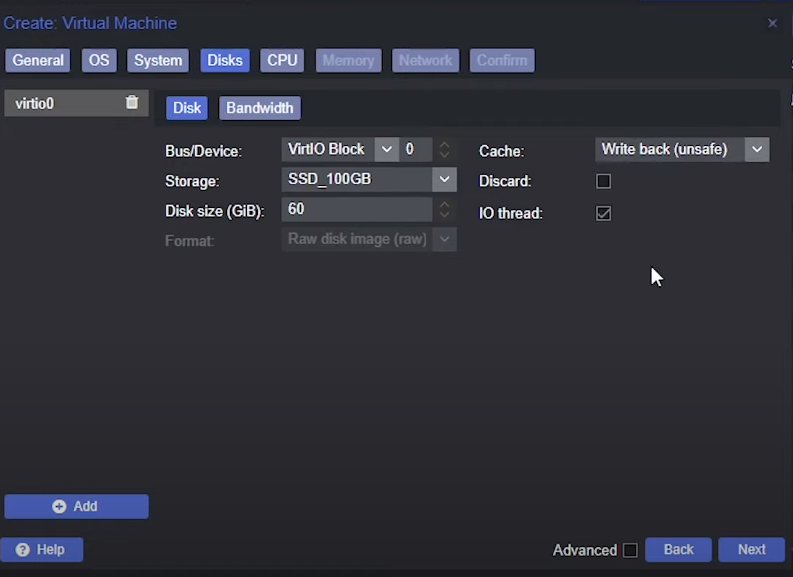
- Bus/Device:
VirtIO Block - Disk Size: at least
60GiB - Cache:
Write back (unsafe)
CPU Tab
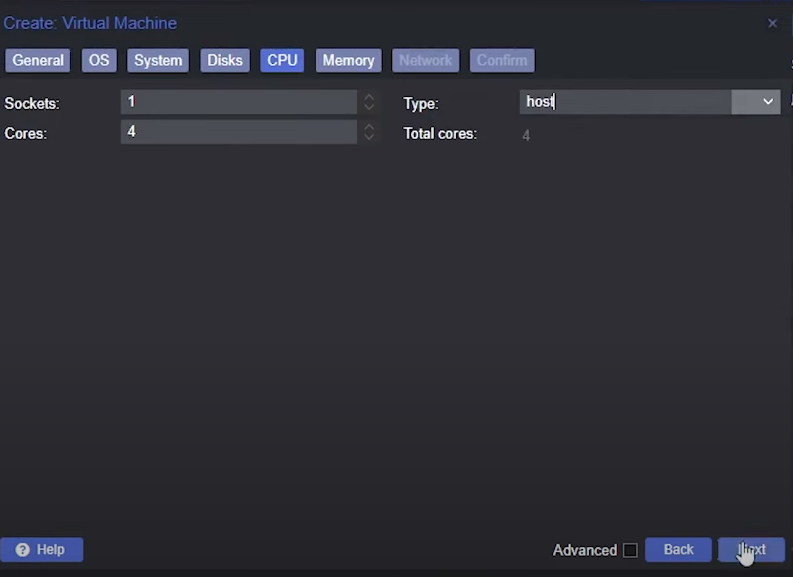
- Cores: at least
4 - Type:
host
Memory Tab
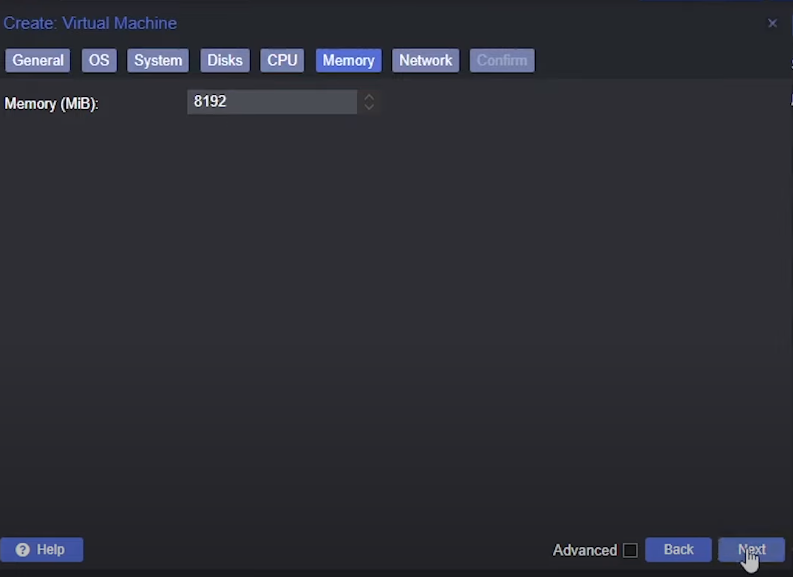
Memory: at least 8192 GiB
Network tab

Model: VMware vmxnet3
Then create the VM
Setup MacOS *.iso in drive
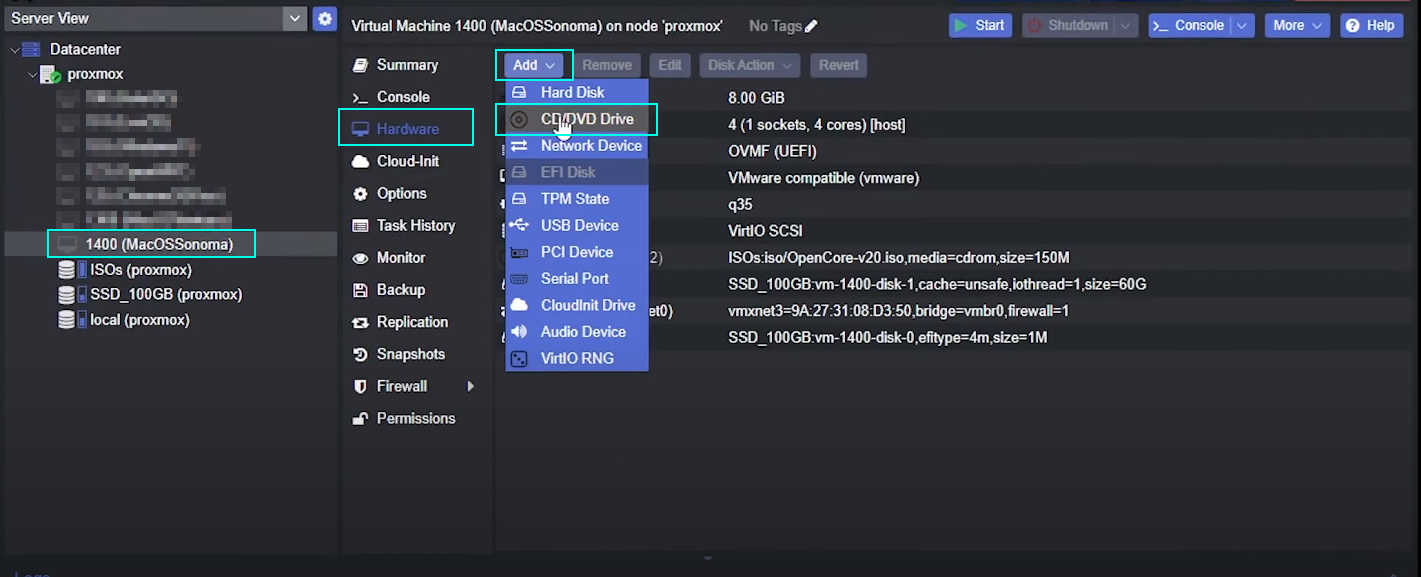
Select the created Vm => Hardware => Add => CD/DVD Drive
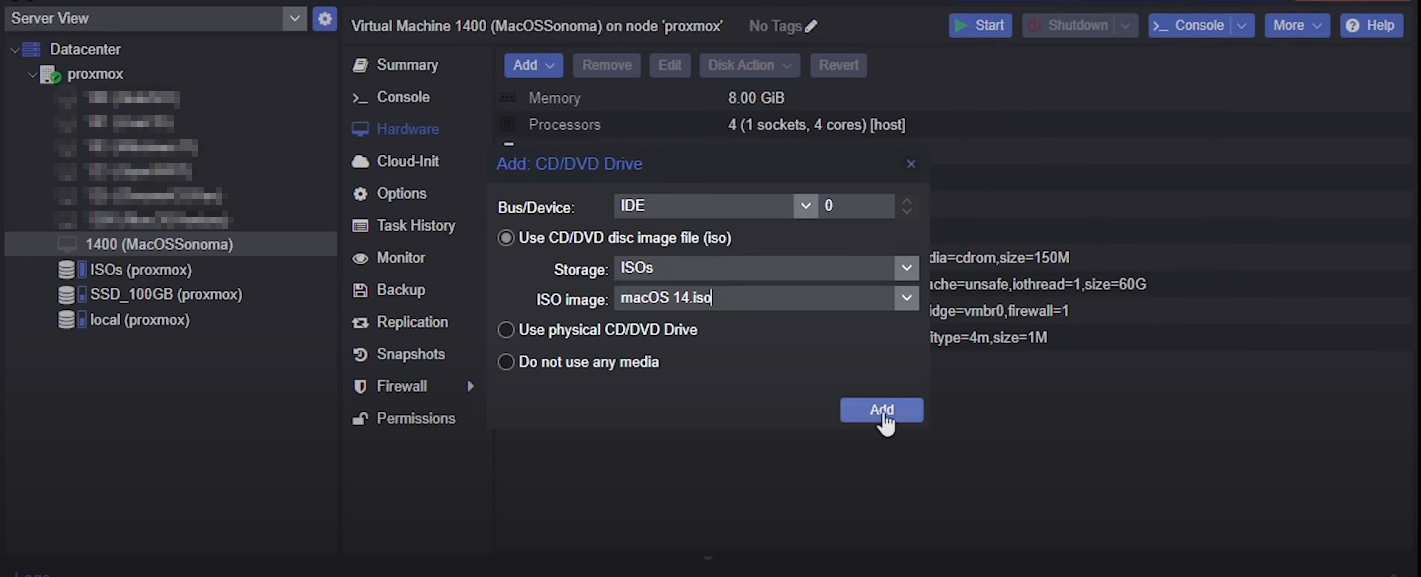
- Storage:
ISOs - ISO image: your macos *.iso image uploaded previously
Configure VM via host terminal
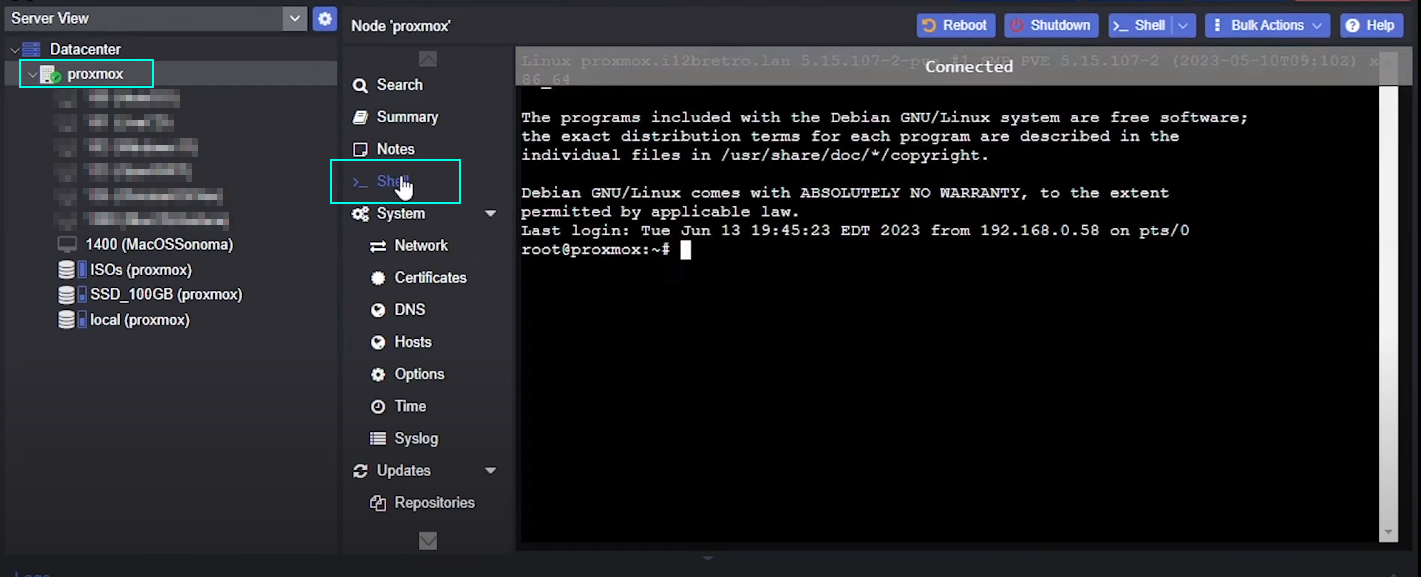
Click on your server name => Shell
then open the config file:
nano /etc/pve/qemu-server/1400.conf
here you should replace 1400 by your VM Id.
then add this line on top of *.conf file:
args: -device isa-applesmc,osk="ourhardworkbythesewordsguardedpleasedontsteal(c)AppleComputerInc" -smbios type=2 -device qemu-xhci -device usb-kbd -device usb-tablet -global nec-usb-xhci.msi=off -global ICH9-LPC.acpi-pci-hotplug-with-bridge-support=off -cpu host,vendor=GenuineIntel,+invtsc,+hypervisor,kvm=on,vmware-cpuid-freq=on

on lines starting with ide_ replace media=cdrom by cache=unsafe
Install MacOS on the VM
Now start the VM.
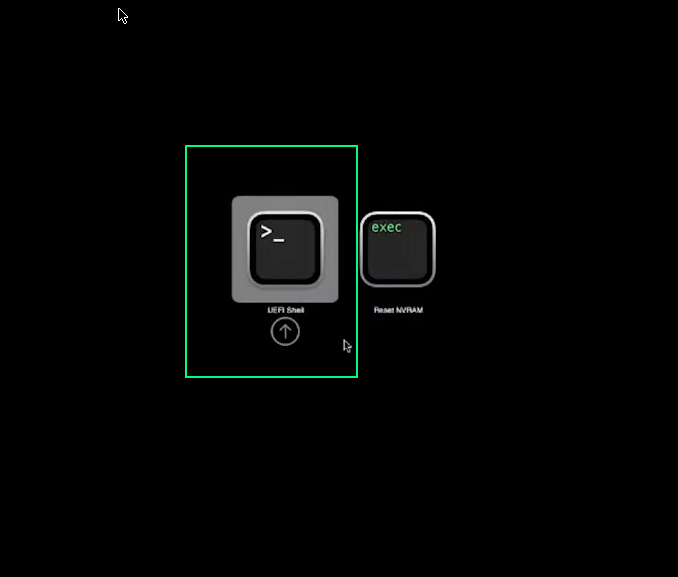
Select UEFI Shell using arrows and enter.
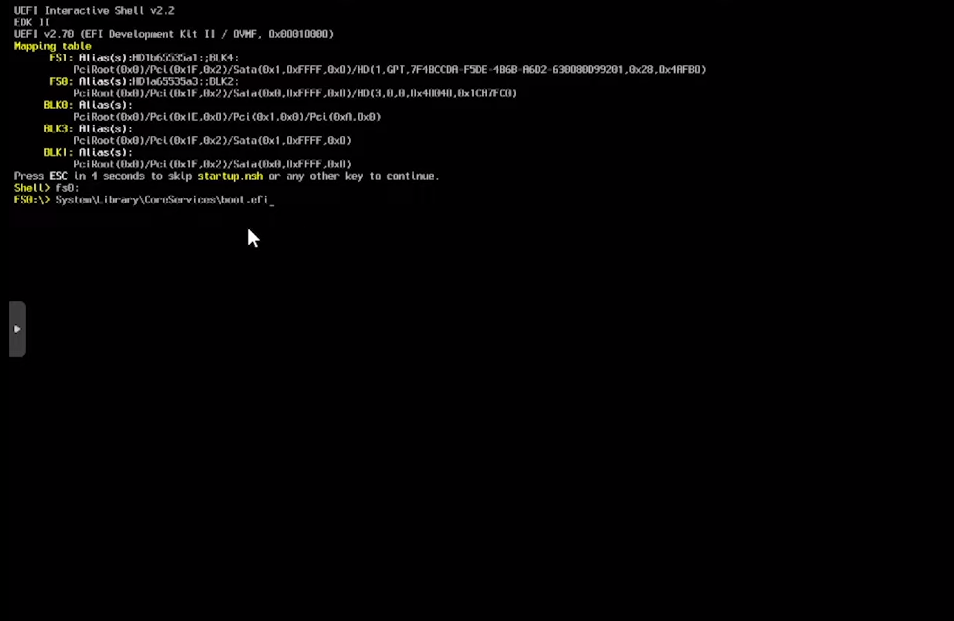
Enter this cmmands to launch boot.efi
fs0:
System\Library\CoreServices\boot.efi
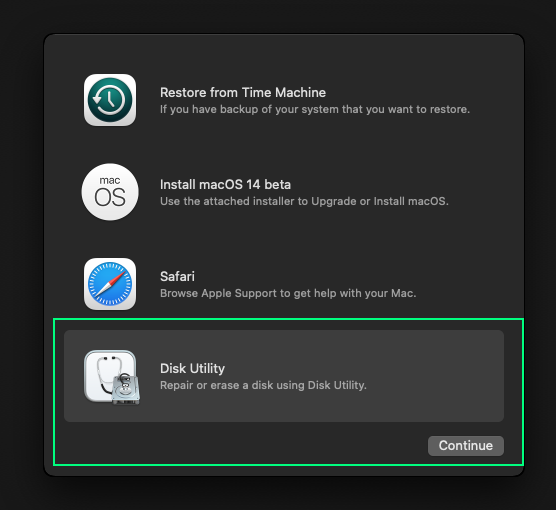
click Disk utility and continue
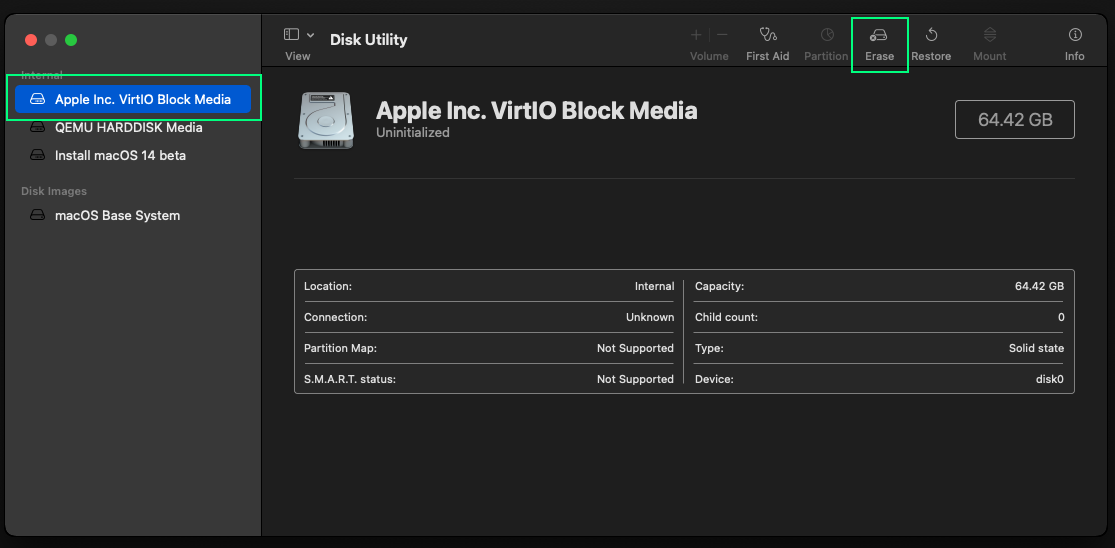
select the VirtIO media block then Erase
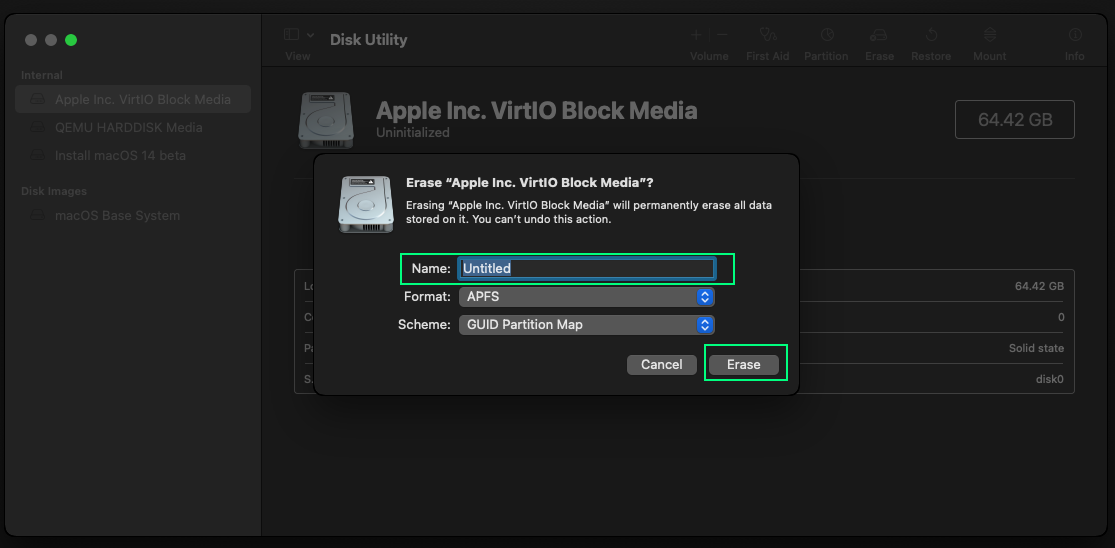
Choose a new name for the media and click Erase
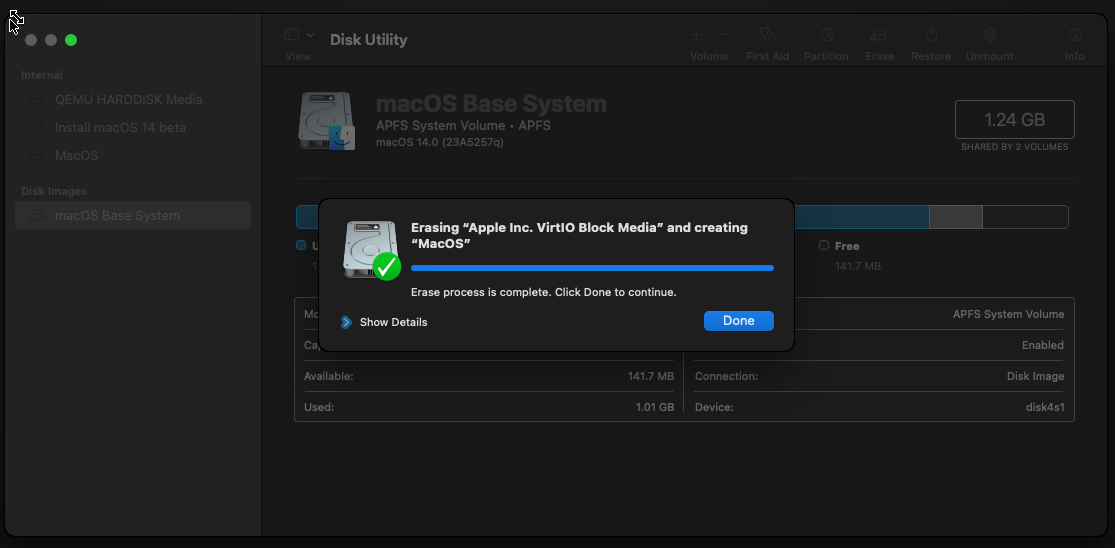
Click Done and close utility.
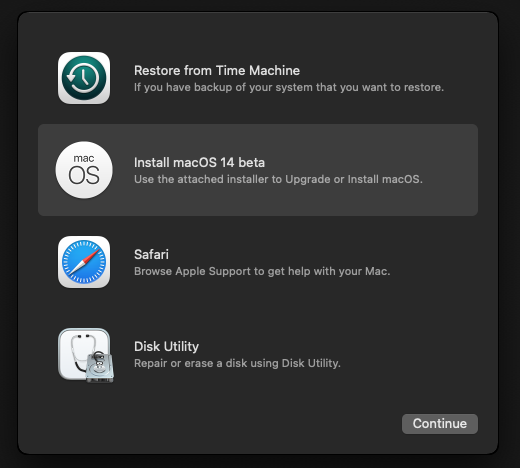
Now click Installl MacOS ... & Continue Then follow the install process.
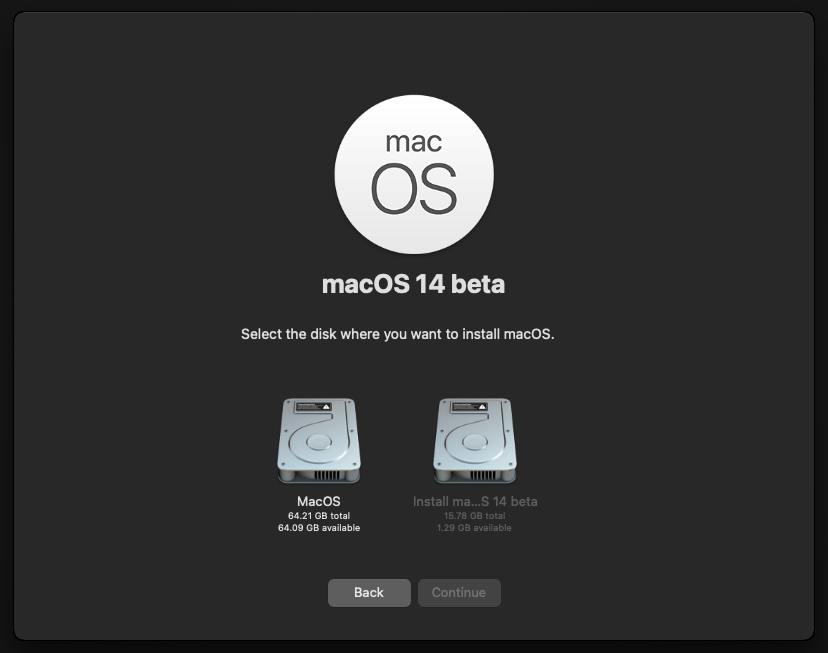
Select the disk you have previously erased (MacOS here) and continue the insatll process.
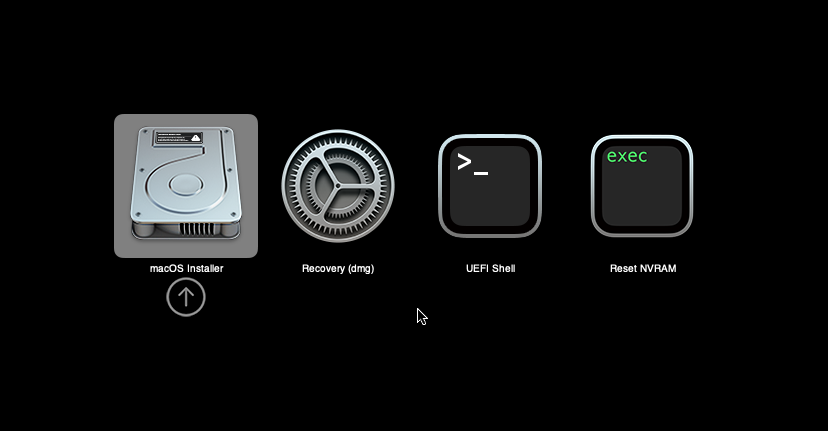
Several time during install process you'll have to select macOS Installer w/ arrow & enter
Follow the notmal macOS install process
Let macOS boot w/o OpenCore
Open a terminal and:
git clone https://github.com/corpnewt/MountEFI
cd MountEFI
chmod +x MountEFI.command
./MountEFI.command
if you are prompted to install git, do so and retry clone the repo.
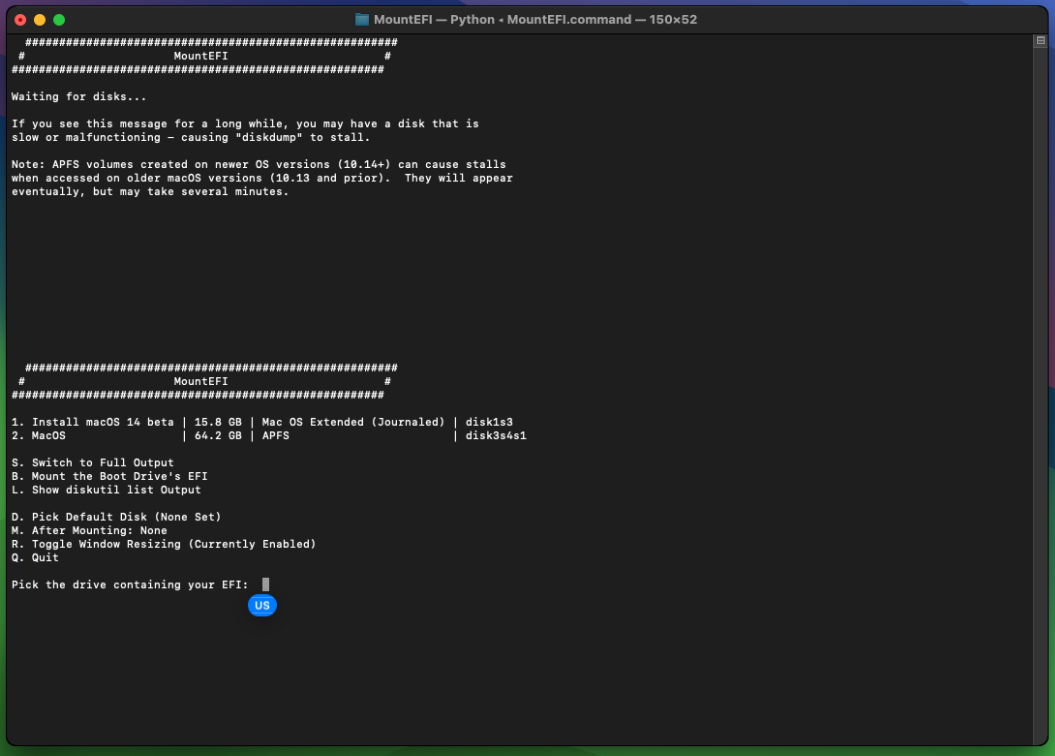
you should now land there, enter B to mount the EFI, you'll be asked to enter your password.
then you should land here:

Download OpenCoreEFIFolder-vxx.zip from the github repo
Unzip it and copy EFI folder to the root of the EFI partition
You can now stop the VM
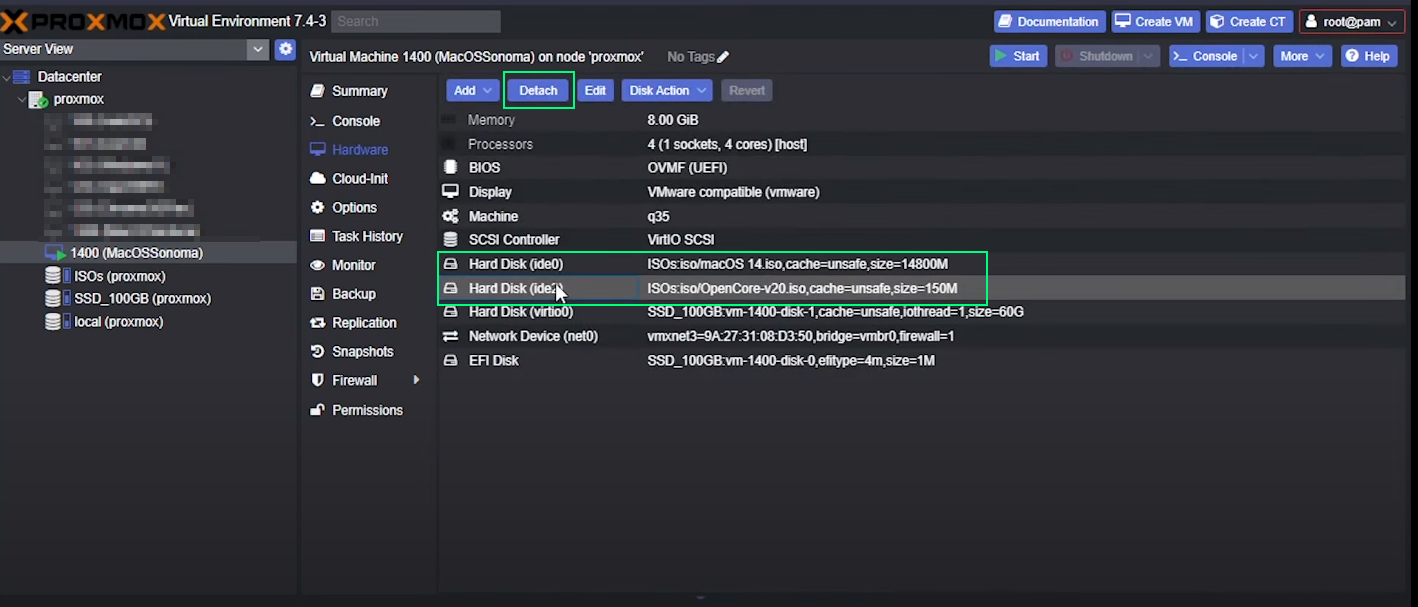
Back to Proxmox admin panel, you should detach both *.iso images from the VM
Yout VM install is now finalized!
Some screenshots and the general flow comes from this video